怎么用云主机配置 生图模型 环境并使用自动弹性扩缩容
1.背景目标
Section titled “1.背景目标”在共绩算力云主机上搭建可弹性伸缩的 SD 生图服务环境,实现:
- 私有化部署生图模型 API 服务
- 根据流量自动扩缩容
- 支持高并发访问
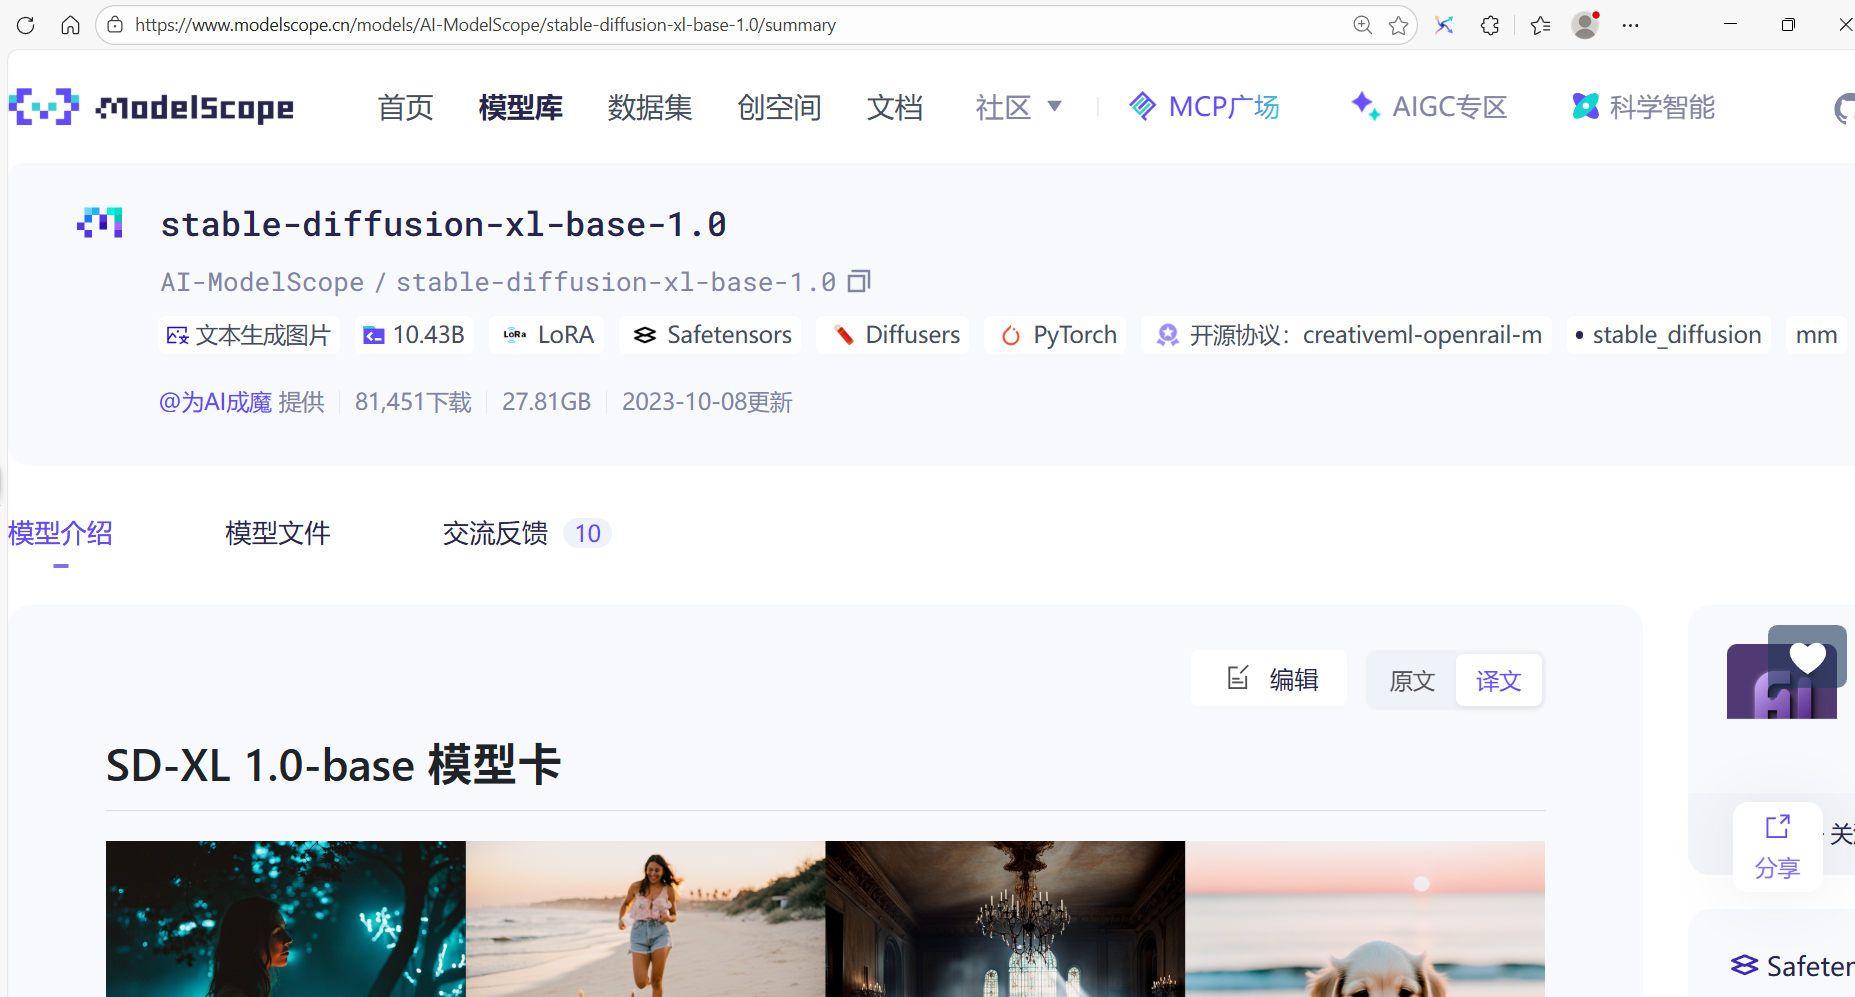
模型链接:https://www.modelscope.cn/models/AI-ModelScope/stable-diffusion-xl-base-1.0/summary
Stable Diffusion XL 是在 SD 的基础上的一个二阶段的级联扩散模型(Latent Diffusion Model),包括 Base 模型和 Refiner 模型。其中 Base 模型的主要工作和 Stable Diffusion 1.x-2.x 一致,具备文生图(txt2img)、图生图(img2img)、图像 inpainting 等能力。在 Base 模型之后,级联了 Refiner 模型,对 Base 模型生成的图像 Latent 特征进行精细化提升,其本质上是在做图生图的工作。
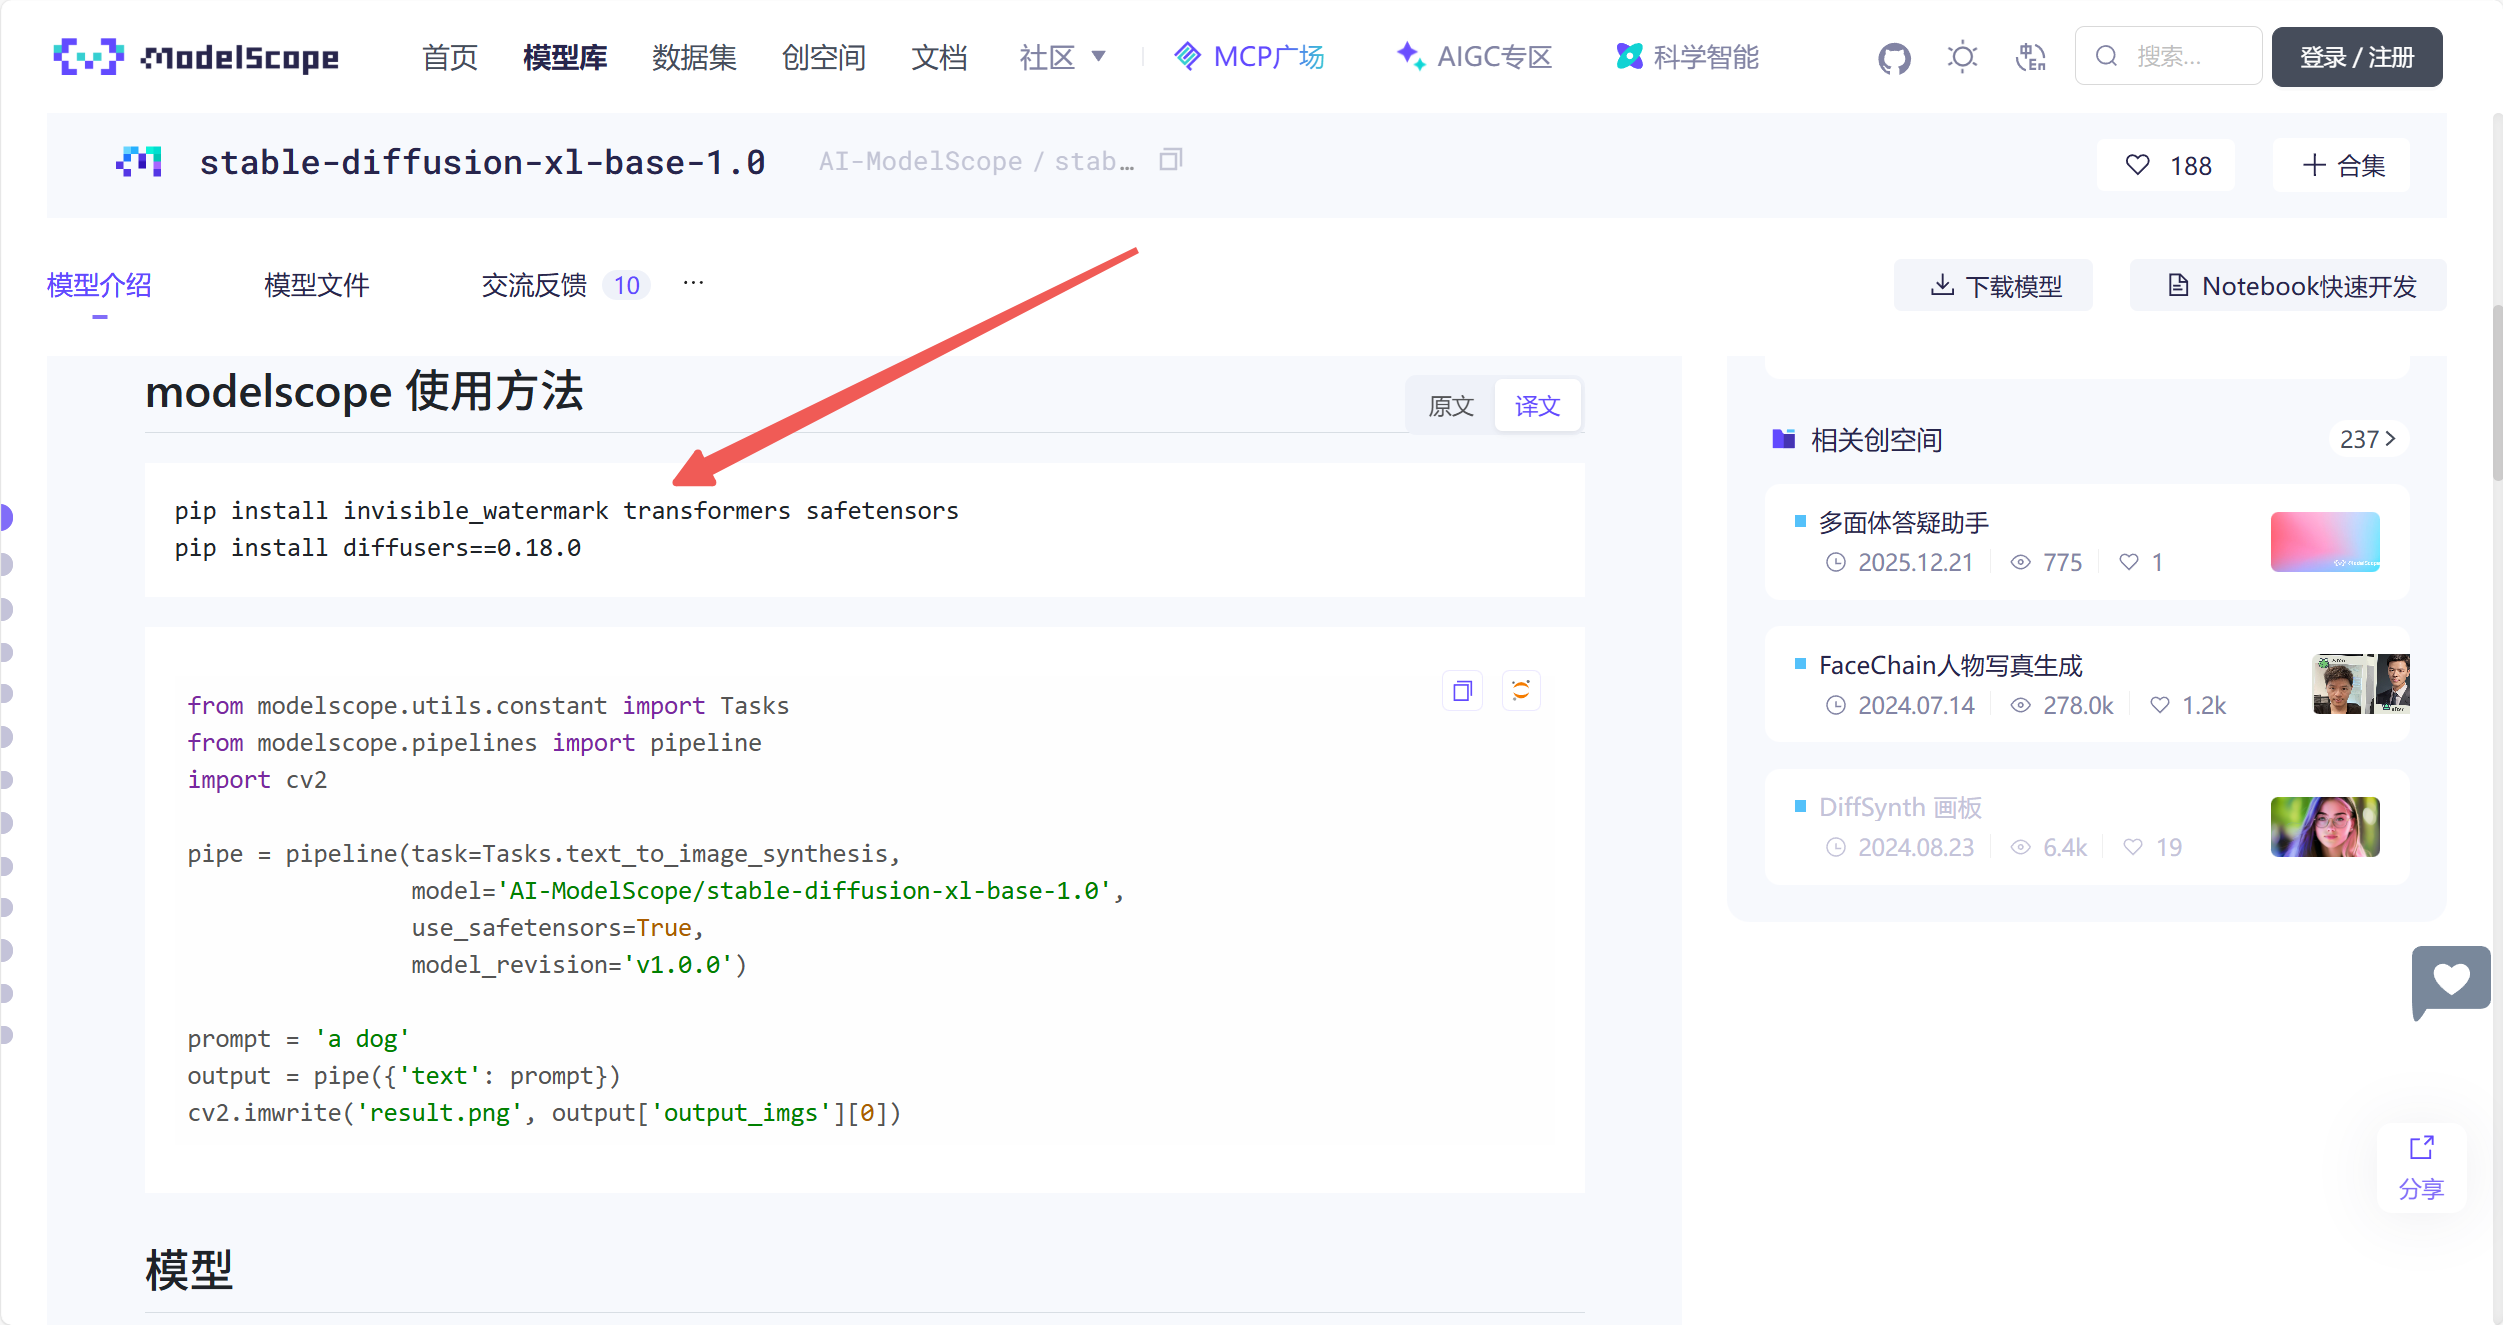
查看模型环境要求以及必要依赖项
2.准备工作
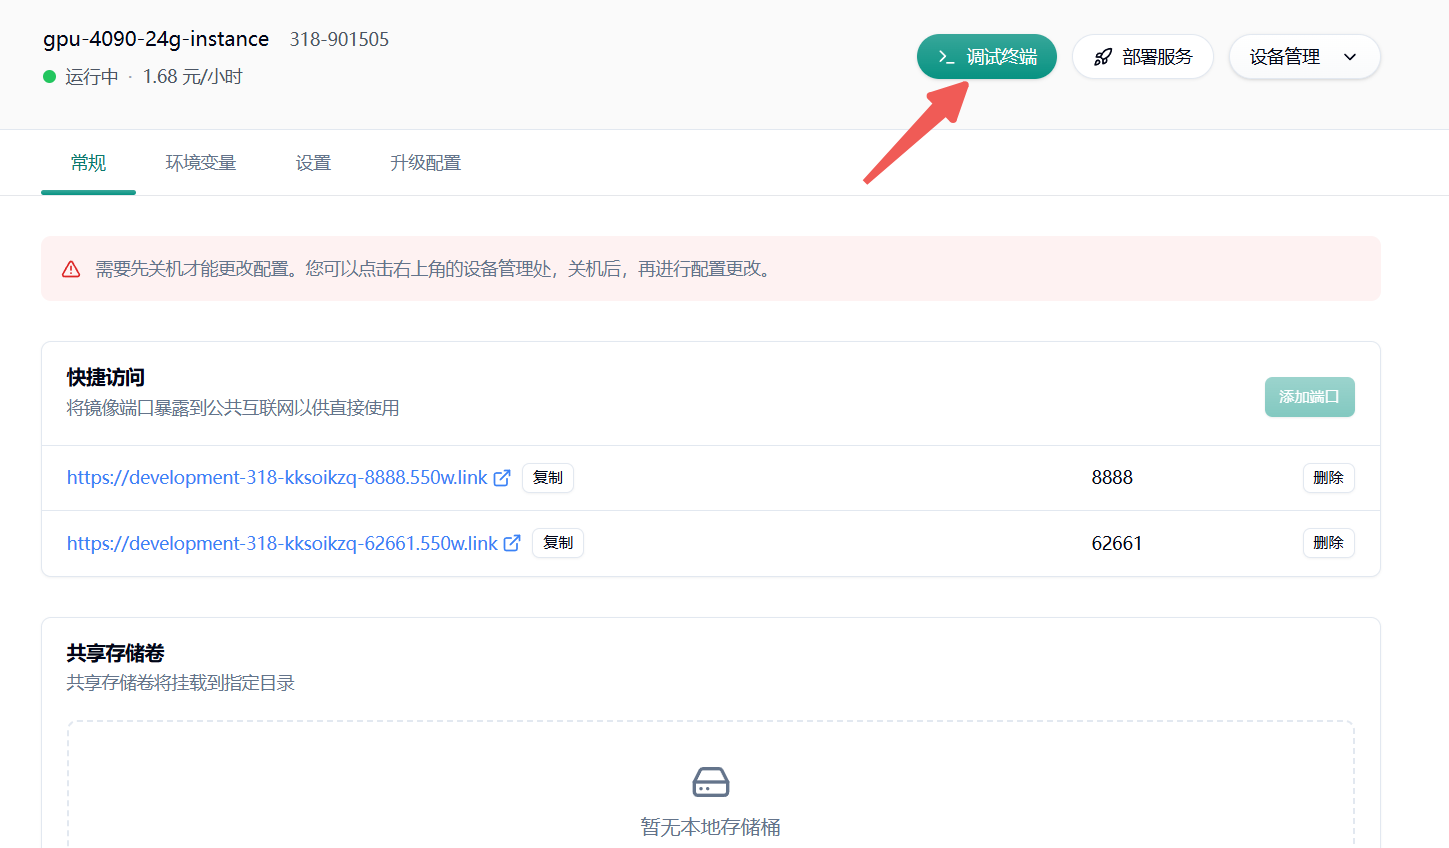
Section titled “2.准备工作”登录云主机,通过共绩算力平台提供的 Web 终端或 Jupyter 终端登录,直接执行以下命令
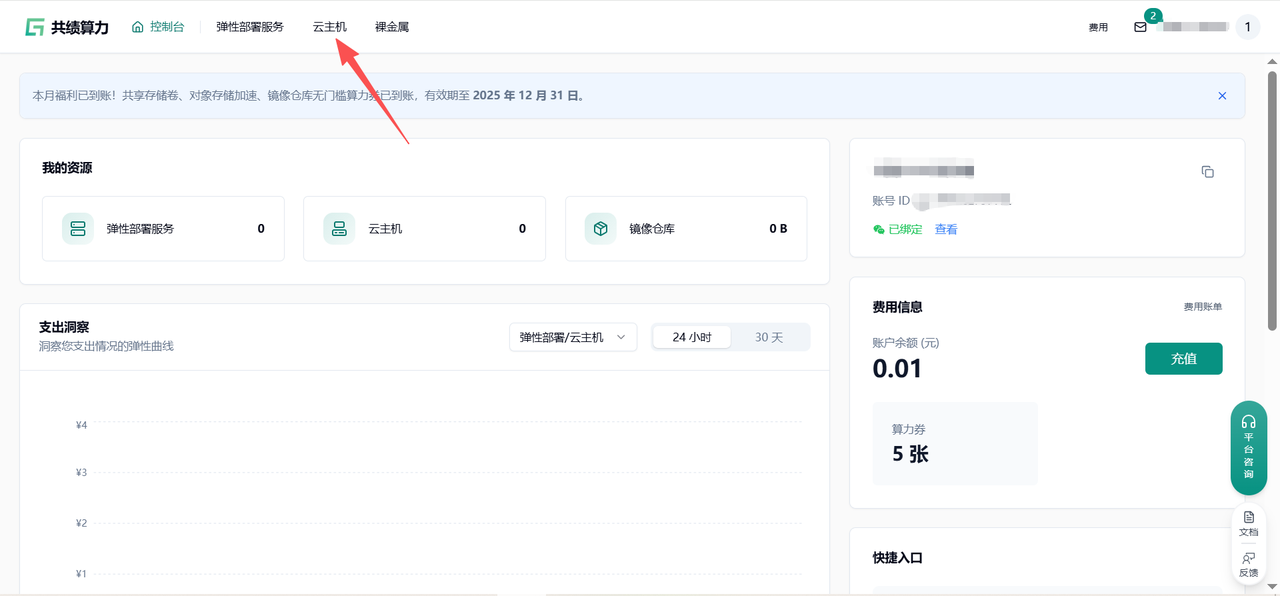
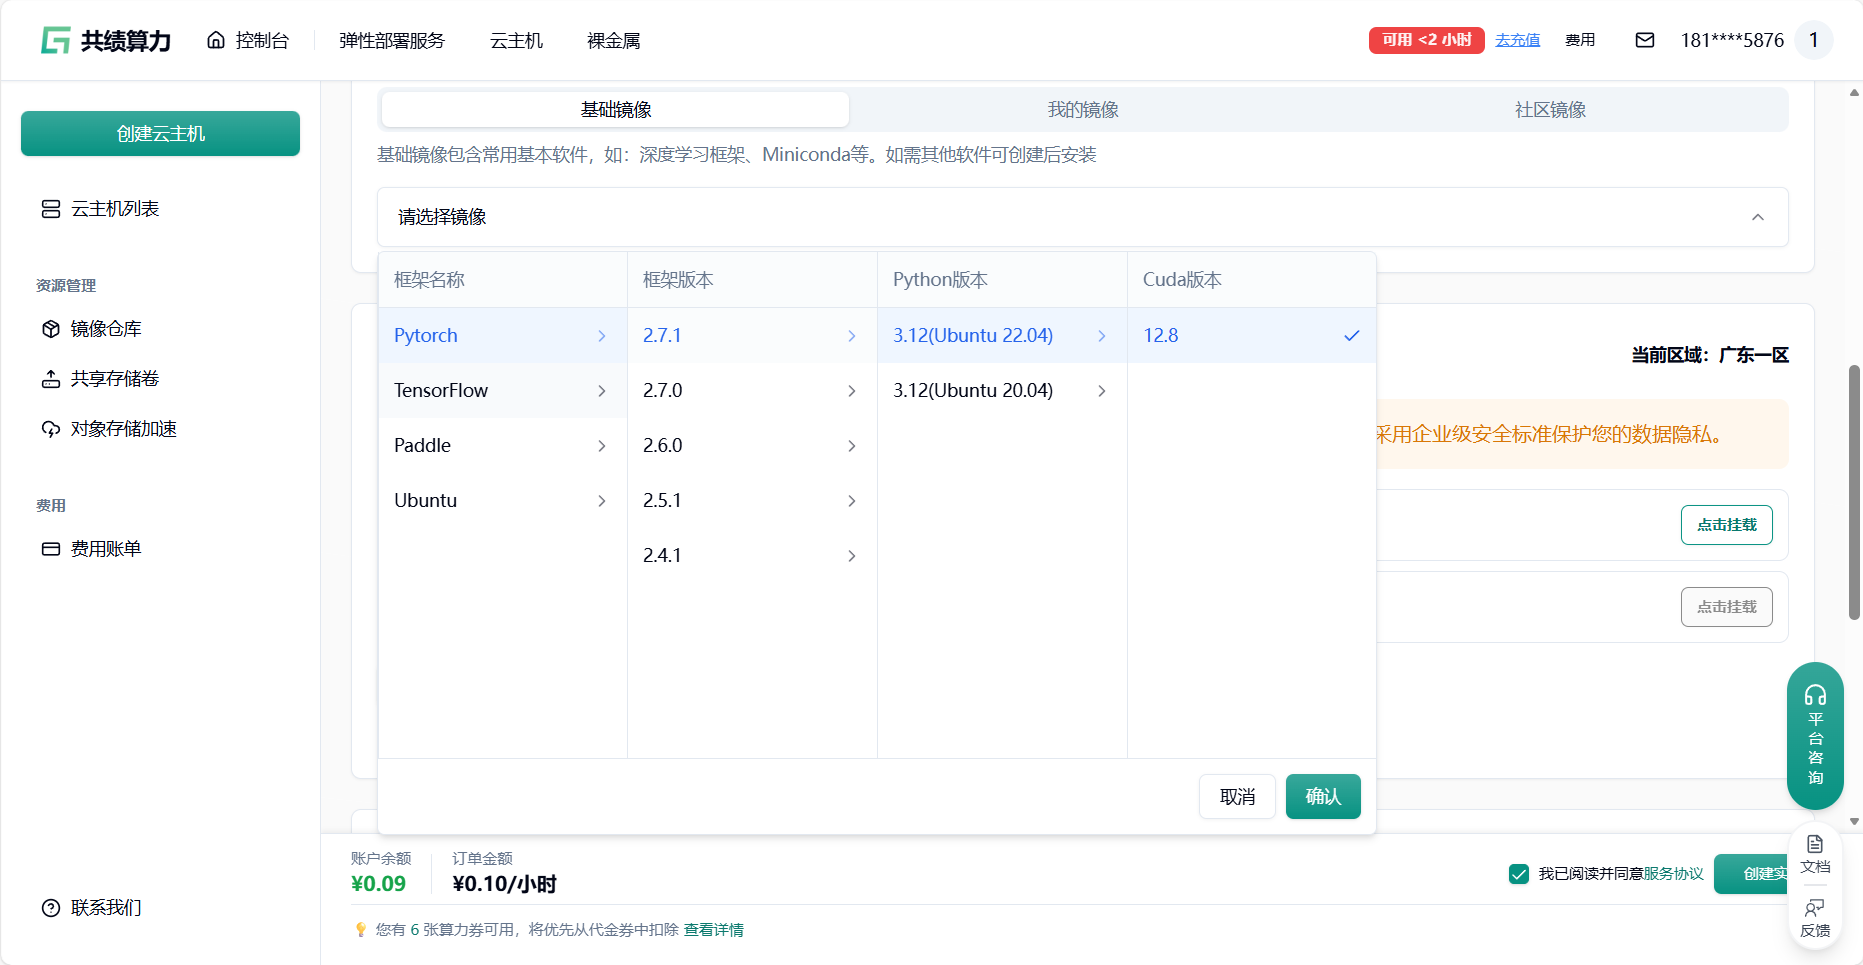
登录共绩算力云主机,选择合适的云主机设备(大部分情况选择 4090 即可,如果需要先下载模型的情况。可以选择 CPU 启动 节省成本)
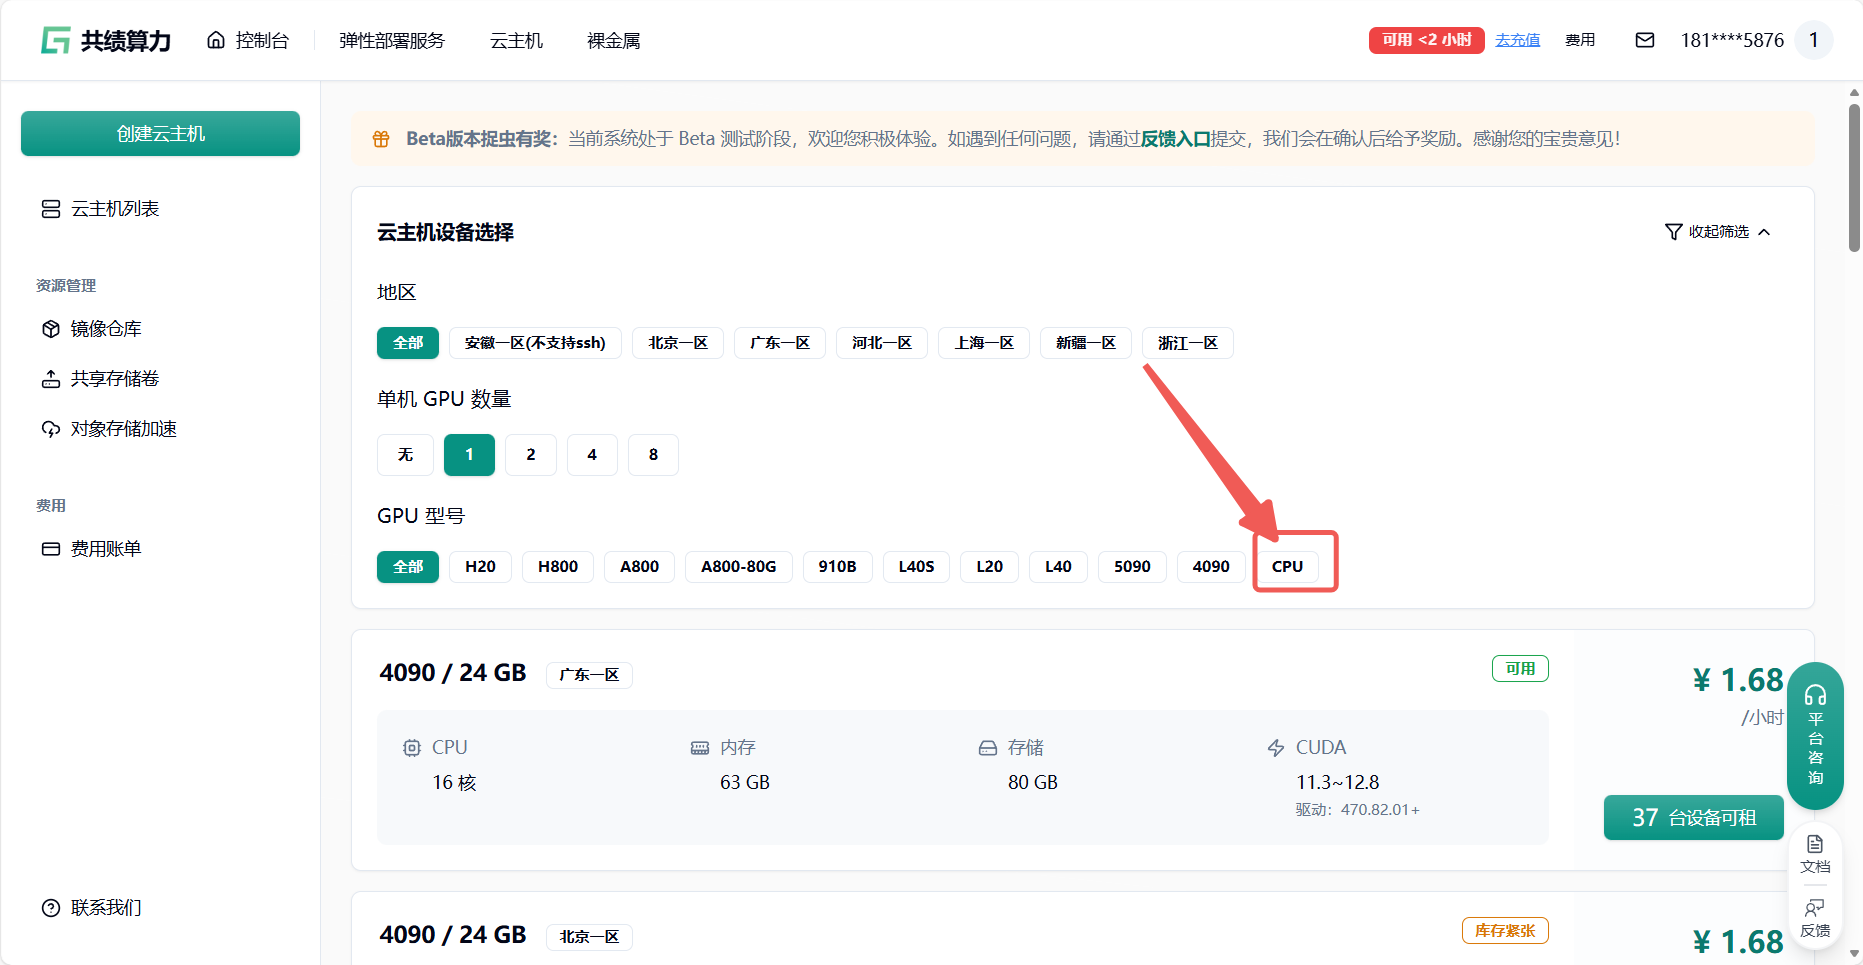
通过刚才的模型环境建议 选择适合的云主机框架环境
我们推荐在云主机中配置环境,存储模块中(对象存储加速中或者共享存储卷)放模型以达到镜像和模型的分离。
目前云主机磁盘限额 80GB,云主机磁盘内存过大会导致 关机/启动 时间过长
详细配置过程可以查看本文档底部附录一 附录二
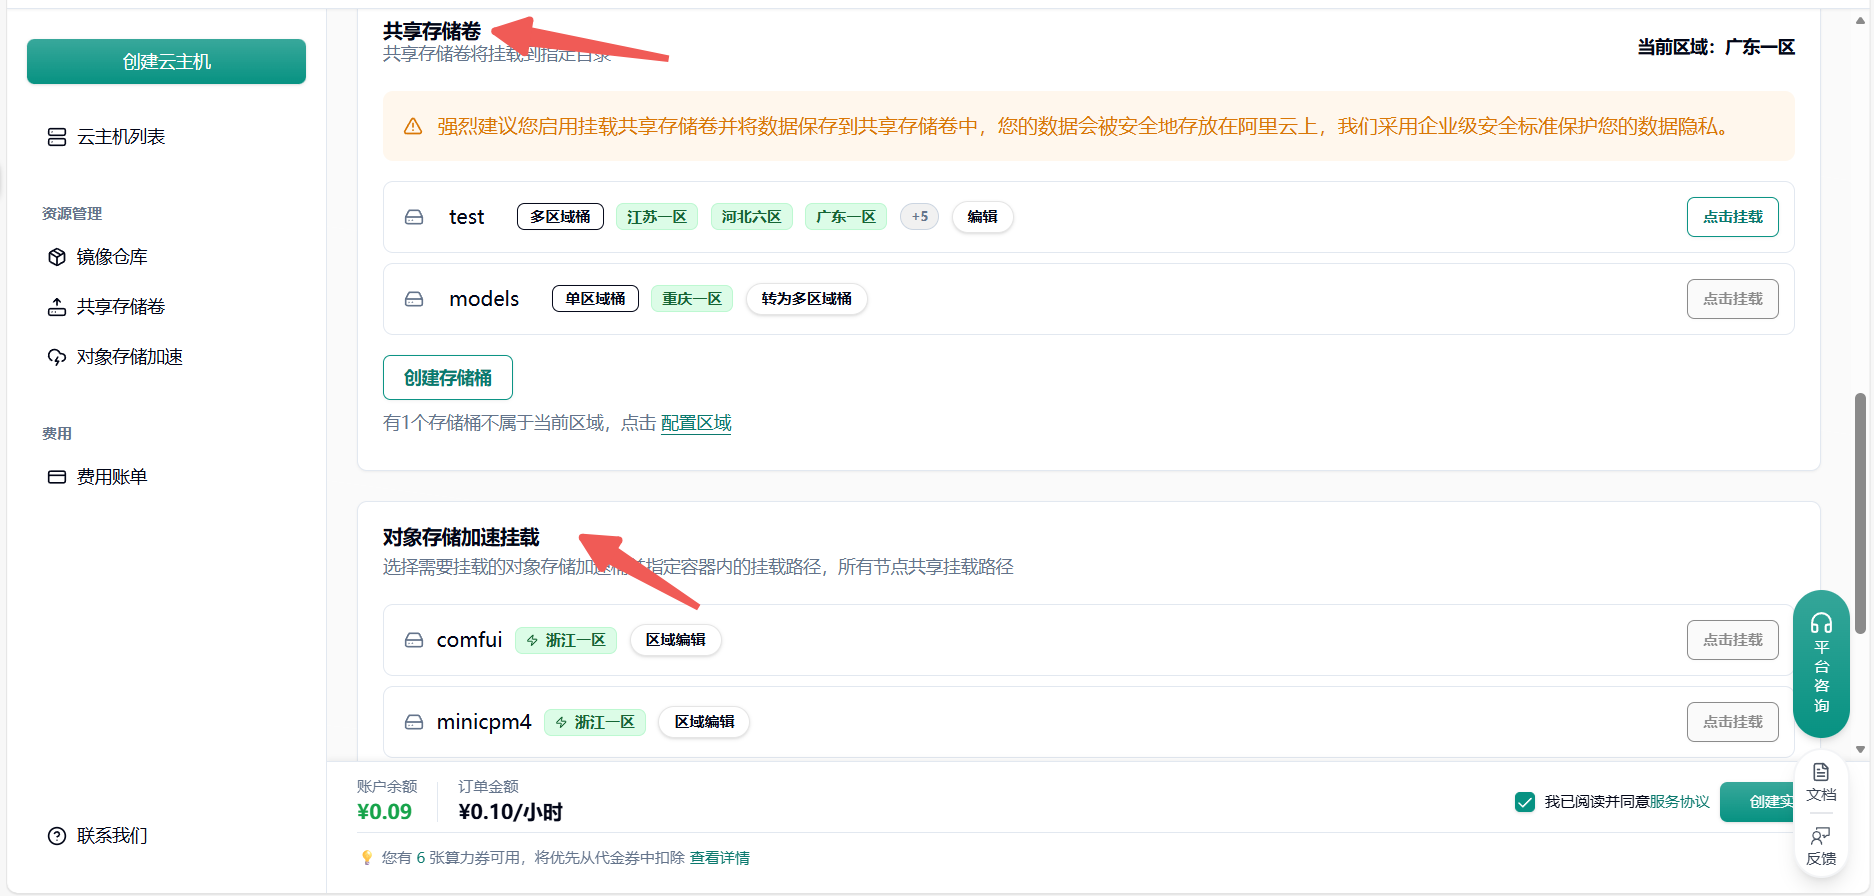
- 共享存储卷:主要用于高性能、高并发的读写场景。它像传统的硬盘或网络文件系统(如 NFS),可以被多个计算节点同时挂载,支持文件的频繁读写和修改,适合训练数据、模型中间结果、日志等需要频繁读写的场景。
- 对象存储加速挂载:主要用于高效读取大规模数据,通常是只读场景。它将对象存储(如 S3)的数据通过挂载的方式直接呈现为本地文件系统,方便访问和读取,适合加载大数据集、预训练模型等只读需求。
通过共绩算力平台提供的 Web 终端或 Jupyter 终端登录,直接执行接下来的操作
如果需要使用 SSH 远程连接可以参考这篇文档:
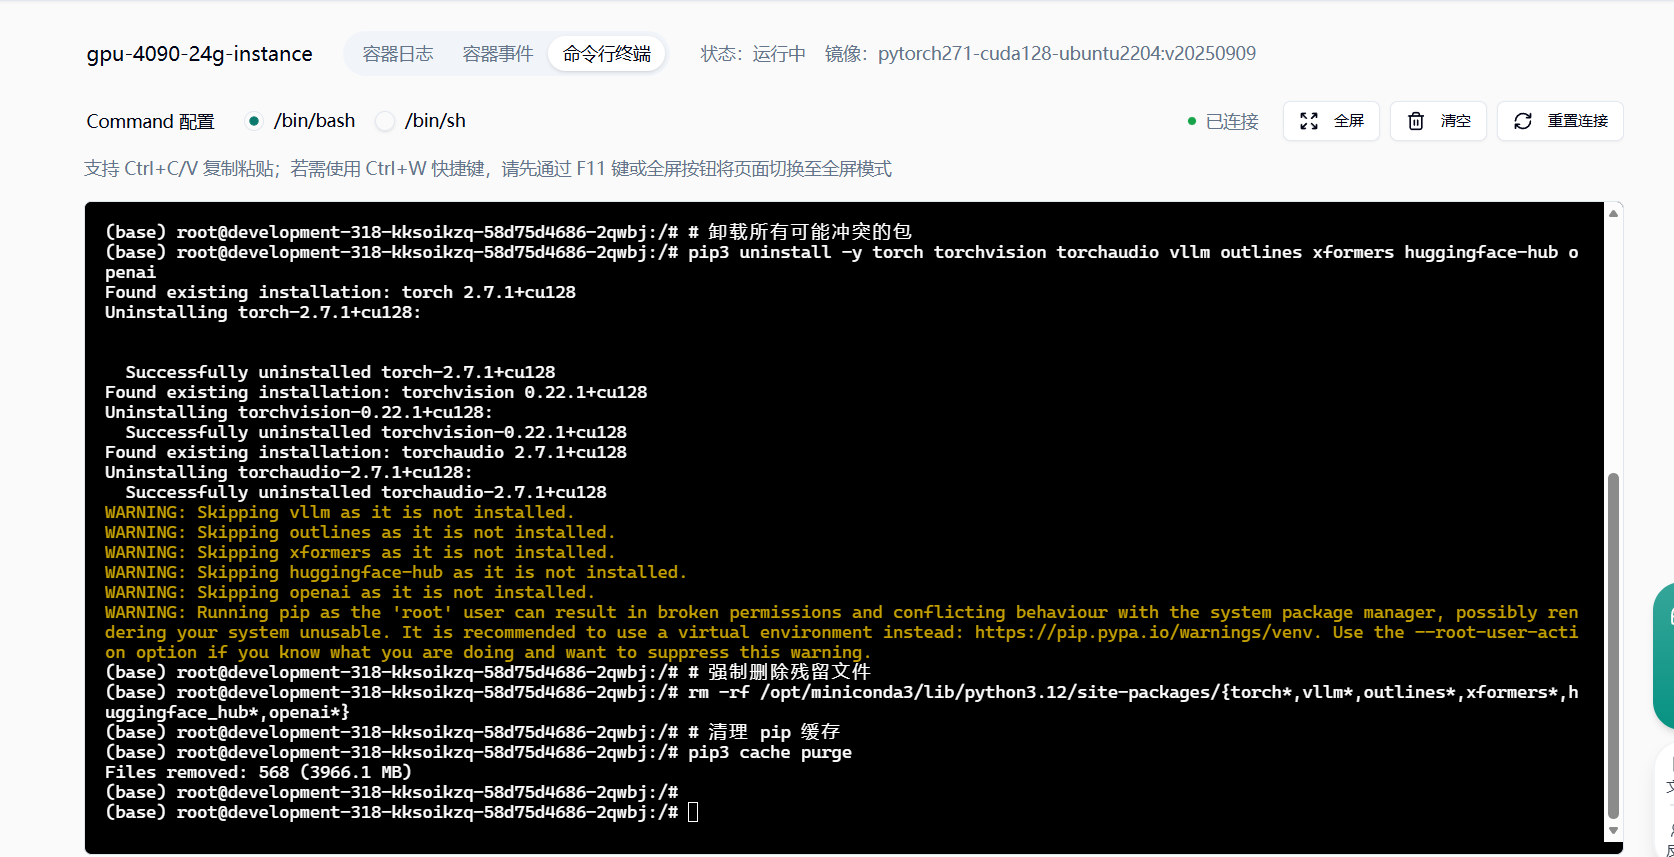
清理旧环境(彻底消除冲突残留)
pip3 uninstall -y torch torchvision torchaudio vllm outlines xformers huggingface-hub openai
rm -rf /opt/miniconda3/lib/python3.12/site-packages/{torch*,vllm*,outlines*,xformers*,huggingface_hub*,openai*}
pip3 cache purge
安装核心依赖(经测试无任何冲突)
requirement.txt:
python>=3.8[transformers](https://zhida.zhihu.com/search?content_id=240307647&content_type=Article&match_order=1&q=transformers&zhida_source=entity)>=4.37.0[accelerate](https://zhida.zhihu.com/search?content_id=240307647&content_type=Article&match_order=1&q=accelerate&zhida_source=entity)>=0.27.0modelscope>=1.9.5numpy>=1.22.3[torch](https://zhida.zhihu.com/search?content_id=240307647&content_type=Article&match_order=1&q=torch&zhida_source=entity)>=1.11.0[gradio](https://zhida.zhihu.com/search?content_id=240307647&content_type=Article&match_order=1&q=gradio&zhida_source=entity)>=4.8.0diffusers>=0.26.3opencv-python>=4.9.0.80safetensors>=0.4.2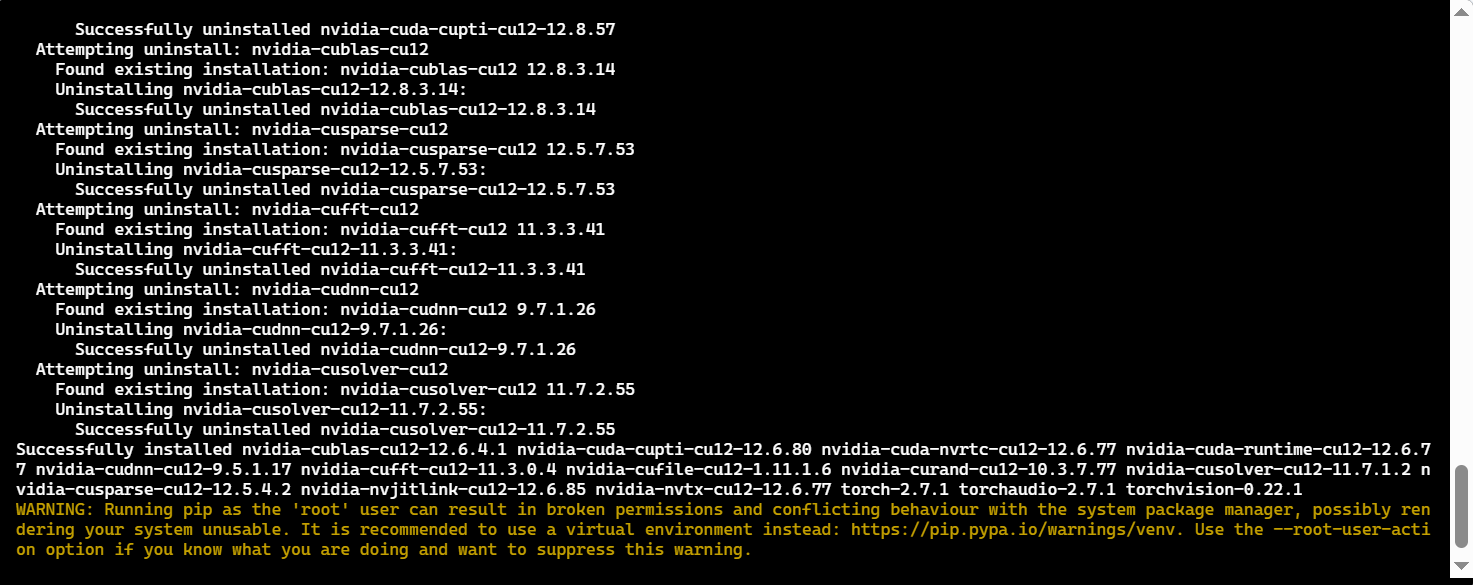
验证环境(确保无兼容问题)
执行以下命令,输出均符合预期则环境正常:
torch.cuda.is_available()这些依赖都搞定以后,咱们就可以通过下面这部分的代码自验,并且开始下载对应的 stable-diffusion-xl-base-1.0 模型了(耗时较久)
我们推荐使用命令行或者 ModelScope SDK 来进行模型的下载。[操作指引](https://www.modelscope.cn/docs/%E6%A8%A1%E5%9E%8B%E7%9A%84%E4%B8%8B%E8%BD%BD)在下载前,请先通过如下命令安装ModelScopepip install modelscope命令行下载下载完整模型库modelscope download --model AI-ModelScope/stable-diffusion-xl-base-1.0下载单个文件到指定本地文件夹(下载载到共享存储卷的路径中(可选))modelscope download --model AI-ModelScope/stable-diffusion-xl-base-1.0 README.md --local_dir ./dir更多更丰富的命令行下载选项,可参见[具体文档](https://www.modelscope.cn/docs/models/download#%E4%BD%BF%E7%94%A8%E5%91%BD%E4%BB%A4%E8%A1%8C%E5%B7%A5%E5%85%B7%E4%B8%8B%E8%BD%BD%E6%A8%A1%E5%9E%8B)SDK下载#模型下载from modelscope import snapshot_downloadmodel_dir = snapshot_download('AI-ModelScope/stable-diffusion-xl-base-1.0')Git下载请确保 lfs 已经被正确安装git lfs installgit clone https://www.modelscope.cn/AI-ModelScope/stable-diffusion-xl-base-1.0.git如果您希望跳过 lfs 大文件下载,可以使用如下命令GIT_LFS_SKIP_SMUDGE=1 git clone https://www.modelscope.cn/AI-Model3.模型调用
Section titled “3.模型调用”import cv2 # pip install opencv-pythonimport torchimport gradio as grimport numpy as npfrom modelscope.utils.constant import Tasksfrom modelscope.pipelines import pipeline
prompt_dict = { "None": "{prompt}", "Enhance": "breathtaking {prompt} . award-winning, professional, highly detailed", "Anime": "anime artwork {prompt} . anime style, key visual, vibrant, studio anime, highly detailed", "Photographic": "cinematic photo {prompt} . 35mm photograph, film, bokeh, professional, 4k, highly detailed", "Digital Art": "concept art {prompt} . digital artwork, illustrative, painterly, matte painting, highly detailed", "Comic Book": "comic {prompt} . graphic illustration, comic art, graphic novel art, vibrant, highly detailed", "Fantasy Art": "ethereal fantasy concept art of {prompt} . magnificent, celestial, ethereal, painterly, epic, majestic, magical, fantasy art, cover art, dreamy", "Analog Film": "analog film photo {prompt} . faded film, desaturated, 35mm photo, grainy, vignette, vintage, Kodachrome, Lomography, stained, highly detailed, found footage", "Neon Punk": "neonpunk style {prompt} . cyberpunk, vaporwave, neon, vibes, vibrant, stunningly beautiful, crisp, detailed, sleek, ultramodern, magenta highlights, dark purple shadows, high contrast, cinematic, ultra detailed, intricate, professional", "Isometric": "isometric style {prompt} . vibrant, beautiful, crisp, detailed, ultra detailed, intricate", "Low Poly": "low-poly style {prompt} . low-poly game art, polygon mesh, jagged, blocky, wireframe edges, centered composition", "Origami": "origami style {prompt} . paper art, pleated paper, folded, origami art, pleats, cut and fold, centered composition", "Line Art": "line art drawing {prompt} . professional, sleek, modern, minimalist, graphic, line art, vector graphics", "Craft Clay": "play-doh style {prompt} . sculpture, clay art, centered composition, Claymation", "Cinematic": "cinematic film still {prompt} . shallow depth of field, vignette, highly detailed, high budget Hollywood movie, bokeh, cinemascope, moody, epic, gorgeous, film grain, grainy", "3D Model": "professional 3d model {prompt} . octane render, highly detailed, volumetric, dramatic lighting", "Pixel Art": "pixel-art {prompt} . low-res, blocky, pixel art style, 8-bit graphics", "Texture": "texture {prompt} top down close-up"}
negative_prompt_dict = { "None": "{negative_prompt}", "Enhance": "{negative_prompt} ugly, deformed, noisy, blurry, distorted, grainy", "Anime": "{negative_prompt} photo, deformed, black and white, realism, disfigured, low contrast", "Photographic": "{negative_prompt} drawing, painting, crayon, sketch, graphite, impressionist, noisy, blurry, soft, deformed, ugly", "Digital Art": "{negative_prompt} photo, photorealistic, realism, ugly", "Comic Book": "{negative_prompt} photograph, deformed, glitch, noisy, realistic, stock photo", "Fantasy Art": "{negative_prompt} photographic, realistic, realism, 35mm film, dslr, cropped, frame, text, deformed, glitch, noise, noisy, off-center, deformed, cross-eyed, closed eyes, bad anatomy, ugly, disfigured, sloppy, duplicate, mutated, black and white", "Analog Film": "{negative_prompt} painting, drawing, illustration, glitch, deformed, mutated, cross-eyed, ugly, disfigured", "Neon Punk": "{negative_prompt} painting, drawing, illustration, glitch, deformed, mutated, cross-eyed, ugly, disfigured", "Isometric": "{negative_prompt} deformed, mutated, ugly, disfigured, blur, blurry, noise, noisy, realistic, photographic", "Low Poly": "{negative_prompt} noisy, sloppy, messy, grainy, highly detailed, ultra textured, photo", "Origami": "{negative_prompt} noisy, sloppy, messy, grainy, highly detailed, ultra textured, photo", "Line Art": "{negative_prompt} anime, photorealistic, 35mm film, deformed, glitch, blurry, noisy, off-center, deformed, cross-eyed, closed eyes, bad anatomy, ugly, disfigured, mutated, realism, realistic, impressionism, expressionism, oil, acrylic", "Craft Clay": "{negative_prompt} sloppy, messy, grainy, highly detailed, ultra textured, photo", "Cinematic": "{negative_prompt} anime, cartoon, graphic, text, painting, crayon, graphite, abstract, glitch, deformed, mutated, ugly, disfigured", "3D Model": "{negative_prompt} ugly, deformed, noisy, low poly, blurry, painting", "Pixel Art": "{negative_prompt} sloppy, messy, blurry, noisy, highly detailed, ultra textured, photo, realistic", "Texture": "{negative_prompt} ugly, deformed, noisy, blurry"}
torch.cuda.empty_cache()
def clear_fn(value): return "", "", "None", 768, 768, 10, 50, None
def concatenate_images(images): # 得到每张图片的高度,并存储在列表中 heights = [img.shape[0] for img in images] # 计算所有图片宽度的总和 max_width = sum([img.shape[1] for img in images]) # 创建一个新的空白图像,大小为最大高度和总宽度 concatenated_image = np.zeros((max(heights), max_width, 3), dtype=np.uint8) x_offset = 0 # 初始化偏移量为 0 for img in images: # 遍历所有图片 # 将图片复制到新图像的相应位置上 concatenated_image[0:img.shape[0], x_offset:x_offset + img.shape[1], :] = img x_offset += img.shape[1] # 更新偏移量为下一张图片的起始位置 return concatenated_image # 返回拼接后的图片
pipe = pipeline(task=Tasks.text_to_image_synthesis, model='AI-ModelScope/stable-diffusion-xl-base-1.0', use_safetensors=True, model_revision='v1.0.0')
def display_pipeline(prompt: str, negative_prompt: str, style: str = 'None', height: int = 768, width: int = 768, scale: float = 10, steps: int = 50, seed: int = 0): # 如果提示为空,则抛出异常 if not prompt: raise gr.Error('The validation prompt is missing.') # 打印预设风格字典中的样式 print(prompt_dict[style]) # 使用预设风格格式化正面提示语 prompt = prompt_dict[style].format(prompt=prompt) # 使用预设风格格式化负面提示语 negative_prompt = negative_prompt_dict[style].format(negative_prompt=negative_prompt) # 创建一个随机数生成器,并设定种子以方便复现结果 generator = torch.Generator(device='cuda').manual_seed(seed) # 调用模型管道生成图片 output = pipe({'text': prompt, 'negative_prompt': negative_prompt, 'num_inference_steps': steps, 'guidance_scale': scale, 'height': height, 'width': width, 'generator': generator }) # 获取输出结果中的图片 result = output['output_imgs'][0] # 定义存储图片的路径 image_path = './lora_result.png' # 将图片写入文件 cv2.imwrite(image_path, result) # 读取图片文件,并将其从 BGR 格式转换为 RGB 格式 image = cv2.cvtColor(cv2.imread(image_path), cv2.COLOR_BGR2RGB) # 返回处理后的图片 return image如果你的 GPU 内存不够出现 OOM 的报错,可以尝试以下解决方案:
- 缓存清理:
gc.collect()torch.cuda.empty_cache()- 换个小点的模型:
pipe = pipeline(task=Tasks.text_to_image_synthesis, model='AI-ModelScope/stable-diffusion-v1-5', use_safetensors=True, model_revision='v1.0.0')4.基于 gradio 的界面构建
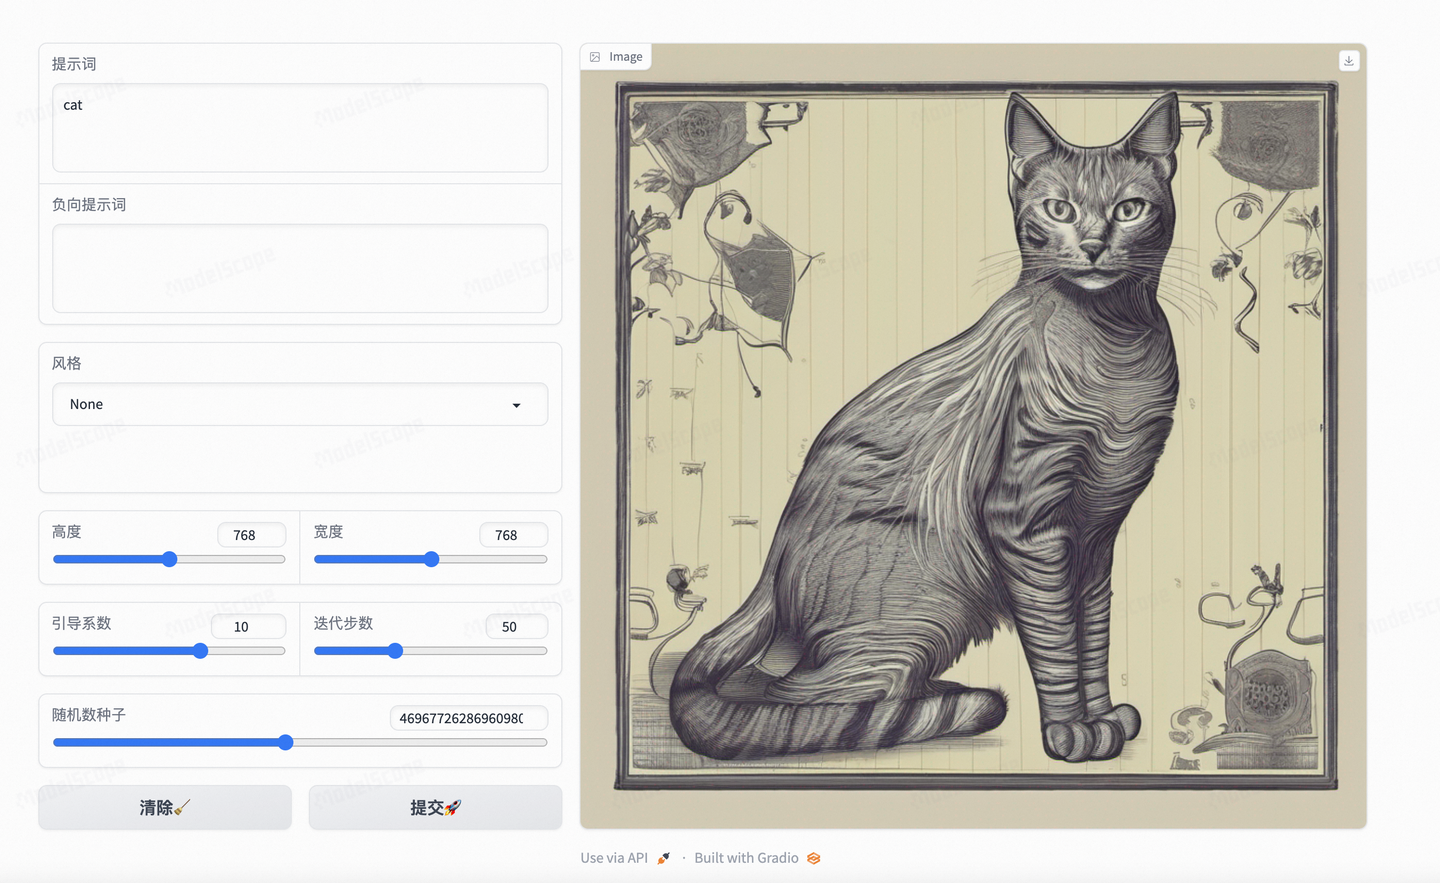
Section titled “4.基于 gradio 的界面构建”同样还是以 gradio 框架为例,通过以下代码快速构建一个用户和模型的交互界面:
with gr.Blocks() as demo:    # 创建一个水平排列的容器,即一行    with gr.Row():        # 在行中创建一个列容器,该容器的大小是默认的两倍        with gr.Column(scale=2):            # 创建一个多行文本框,用于输入提示词            prompt = gr.Textbox(label='提示词', lines=3)            # 创建一个多行文本框,用于输入负向提示词            negative_prompt = gr.Textbox(label='负向提示词', lines=3)            # 创建一个下拉菜单,用于选择风格,列出各种风格选项            style = gr.Dropdown(                ['None', 'Enhance', 'Anime', 'Photographic', 'Digital Art', 'Comic Book', 'Fantasy Art', 'Analog Film',                 'Cinematic', '3D Model', 'Neon Punk', 'Pixel Art', 'Isometric', 'Low Poly', 'Origami', 'Line Art',                 'Craft Clay', 'Texture'], value='None', label='风格')            with gr.Row():                # 创建一个滑块,用于选择图片高度                height = gr.Slider(512, 1024, 768, step=128, label='高度')                # 创建一个滑块,用于选择图片宽度                width = gr.Slider(512, 1024, 768, step=128, label='宽度')            with gr.Row():                # 创建一个滑块,用于选择引导系数                scale = gr.Slider(1, 15, 10, step=.25, label='引导系数')                # 创建一个滑块,用于选择迭代步数                steps = gr.Slider(25, maximum=100, value=50, step=5, label='迭代步数')
            # 创建一个滑块,用于选择随机数种子,并且有一个随机化按钮            seed = gr.Slider(minimum=1, step=1, maximum=999999999999999999, randomize=True, label='随机数种子')            # 创建一个水平排列的容器,即一行            with gr.Row():                # 创建一个按钮,用于清除输入                clear = gr.Button("清除")                # 创建一个按钮,用于提交输入并生成图片                submit = gr.Button("提交")        # 在行中创建另一个列容器,该容器的大小是默认的三倍        with gr.Column(scale=3):            # 创建一个用于显示输出图片的组件            output_image = gr.Image()    # 当提交按钮被点击时,调用 display_pipeline 函数并将输入参数传递给它,将结果输出到 output_image 组件    submit.click(fn=display_pipeline, inputs=[prompt, negative_prompt, style, height, width, scale, steps, seed],                 outputs=output_image)    # 当清除按钮被点击时,调用 clear_fn 函数,将 clear 作为输入,输出到指定的组件上,并将它们重置为初始状态    clear.click(fn=clear_fn, inputs=clear,                outputs=[prompt, negative_prompt, style, height, width, scale, steps, output_image])

demo.queue(status_update_rate=1).launch(share=False)
至此,在本地机器上运行的话(把上述所有代码都粘贴到一个 app.py 脚本,运行即可)
咱们在平台上访问 7860 端口的链接就可以看到效果页面了!
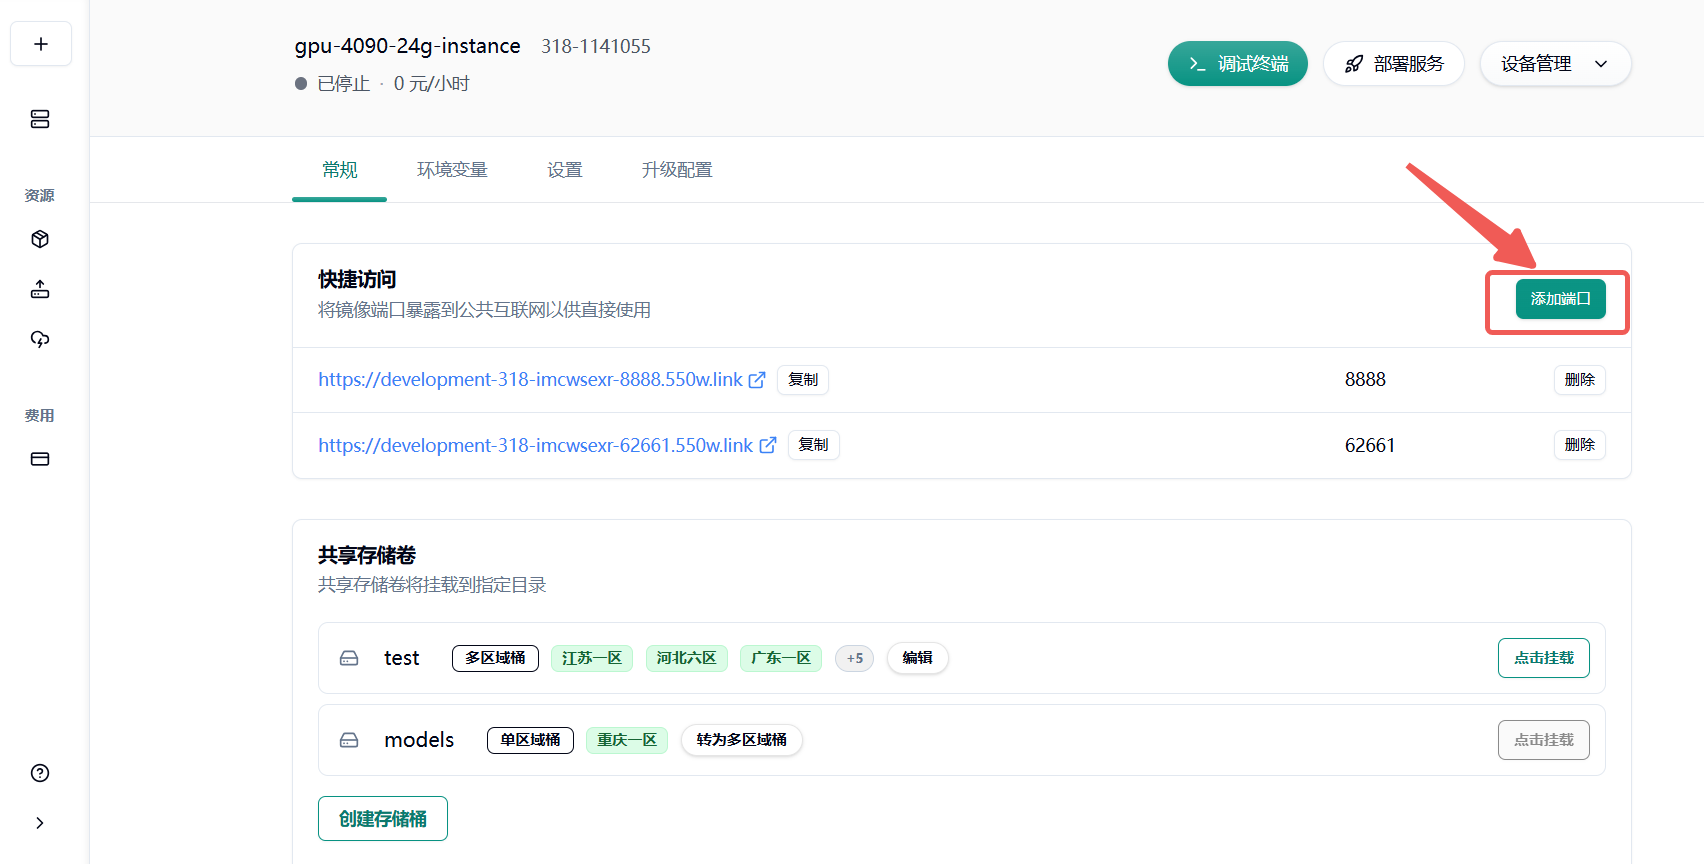
有些小伙伴的 GPU 环境在远处服务器上,还需做一道端口转发,例如:
可以参考这篇文档
(本地执行)ssh -L 9000:127.0.0.1:7860 用户 ID@远程机器 IP然后本地访问 http://127.0.0.1:9000/ 即可
好啦,如此一来,一个本地的文生图应用就构建完毕
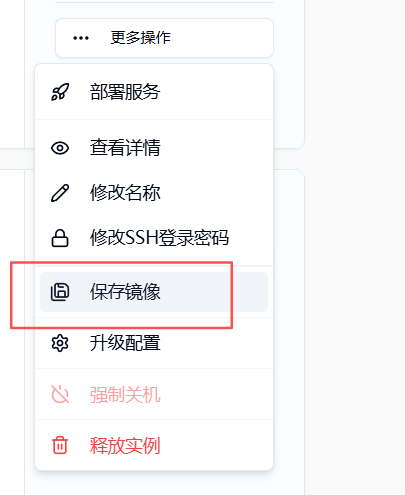
用户在完成一个阶段性配置之后可以通过云主机列表页 保存镜像选项 自定义 tag 保存,方便之后再次使用
5.非平台基础镜像如何配置 SSH 连接
Section titled “5.非平台基础镜像如何配置 SSH 连接”6.如何转换为弹性部署服务(自动弹性扩缩容)
Section titled “6.如何转换为弹性部署服务(自动弹性扩缩容)”若您的业务流量存在明显波动或需要按需使用资源以控制成本,强烈建议启用自动扩缩容功能。按需分配资源,避免资源浪费,确保任务稳定运行,提升效率并降低长时间占用成本。
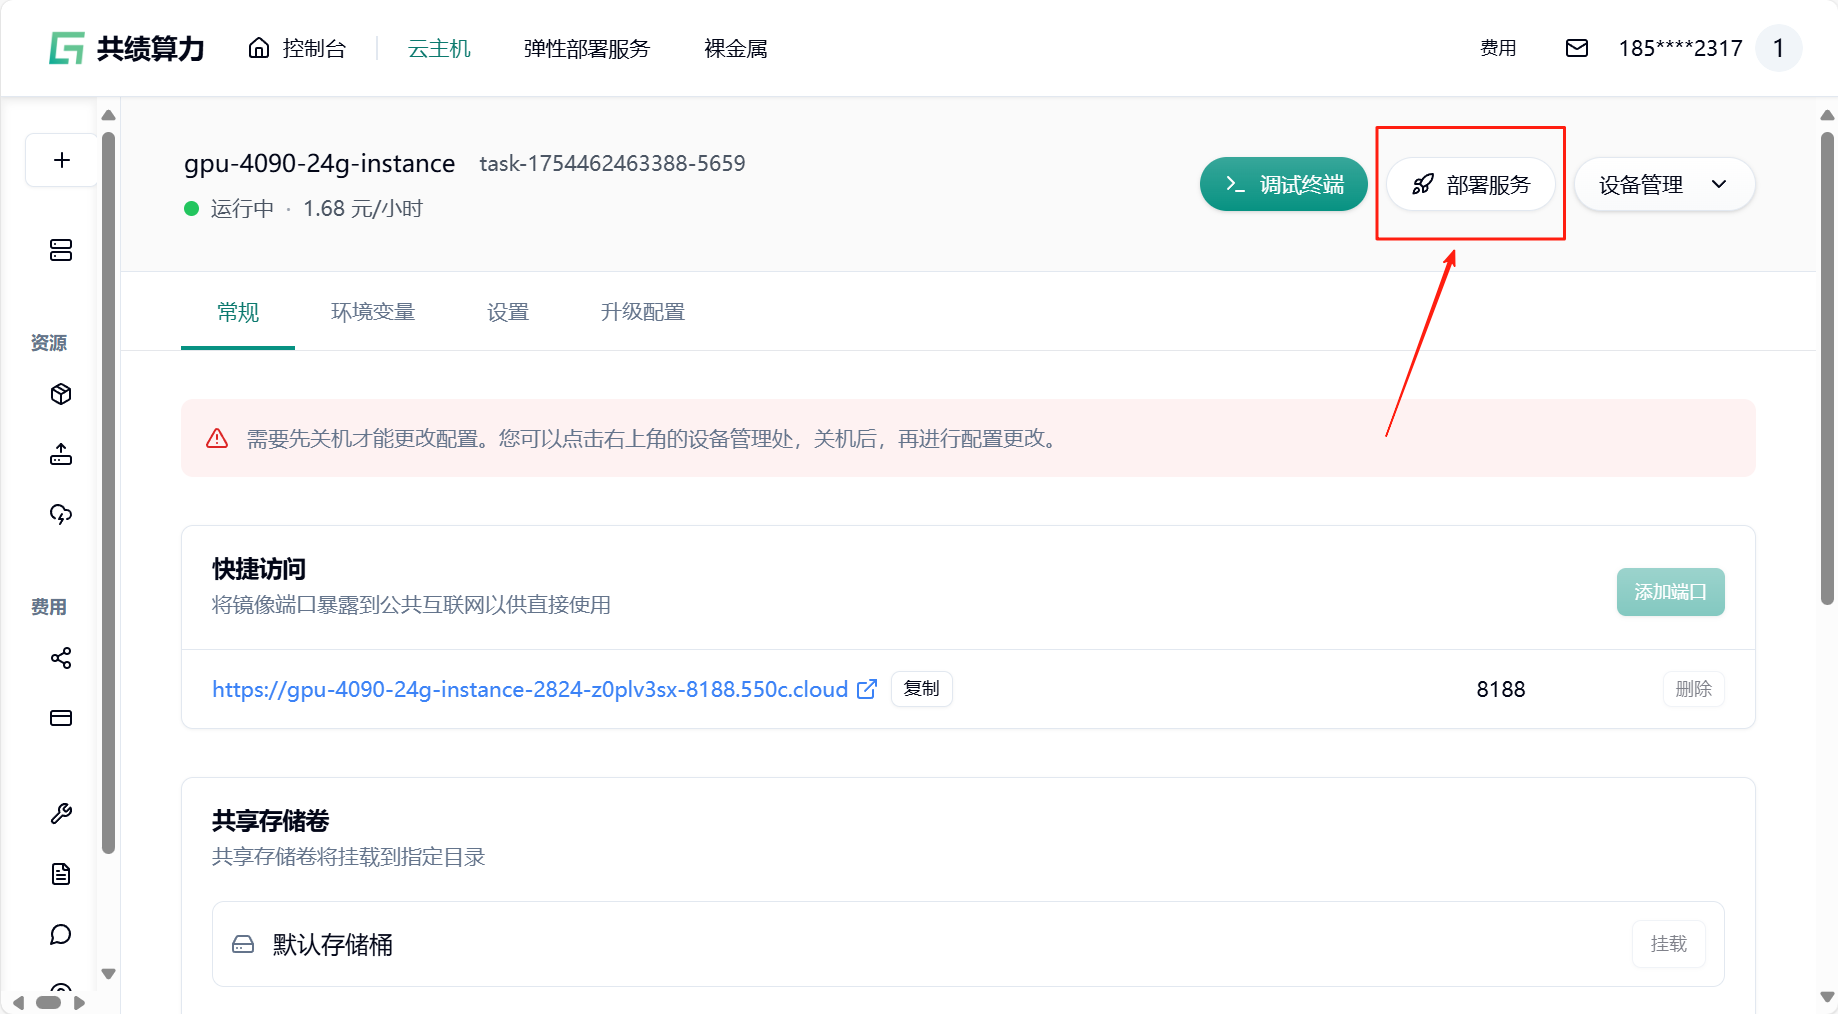
- 回到云主机页面,找到“部署服务”
- 关机并保存镜像,输入镜像标签

- 选择最新版本

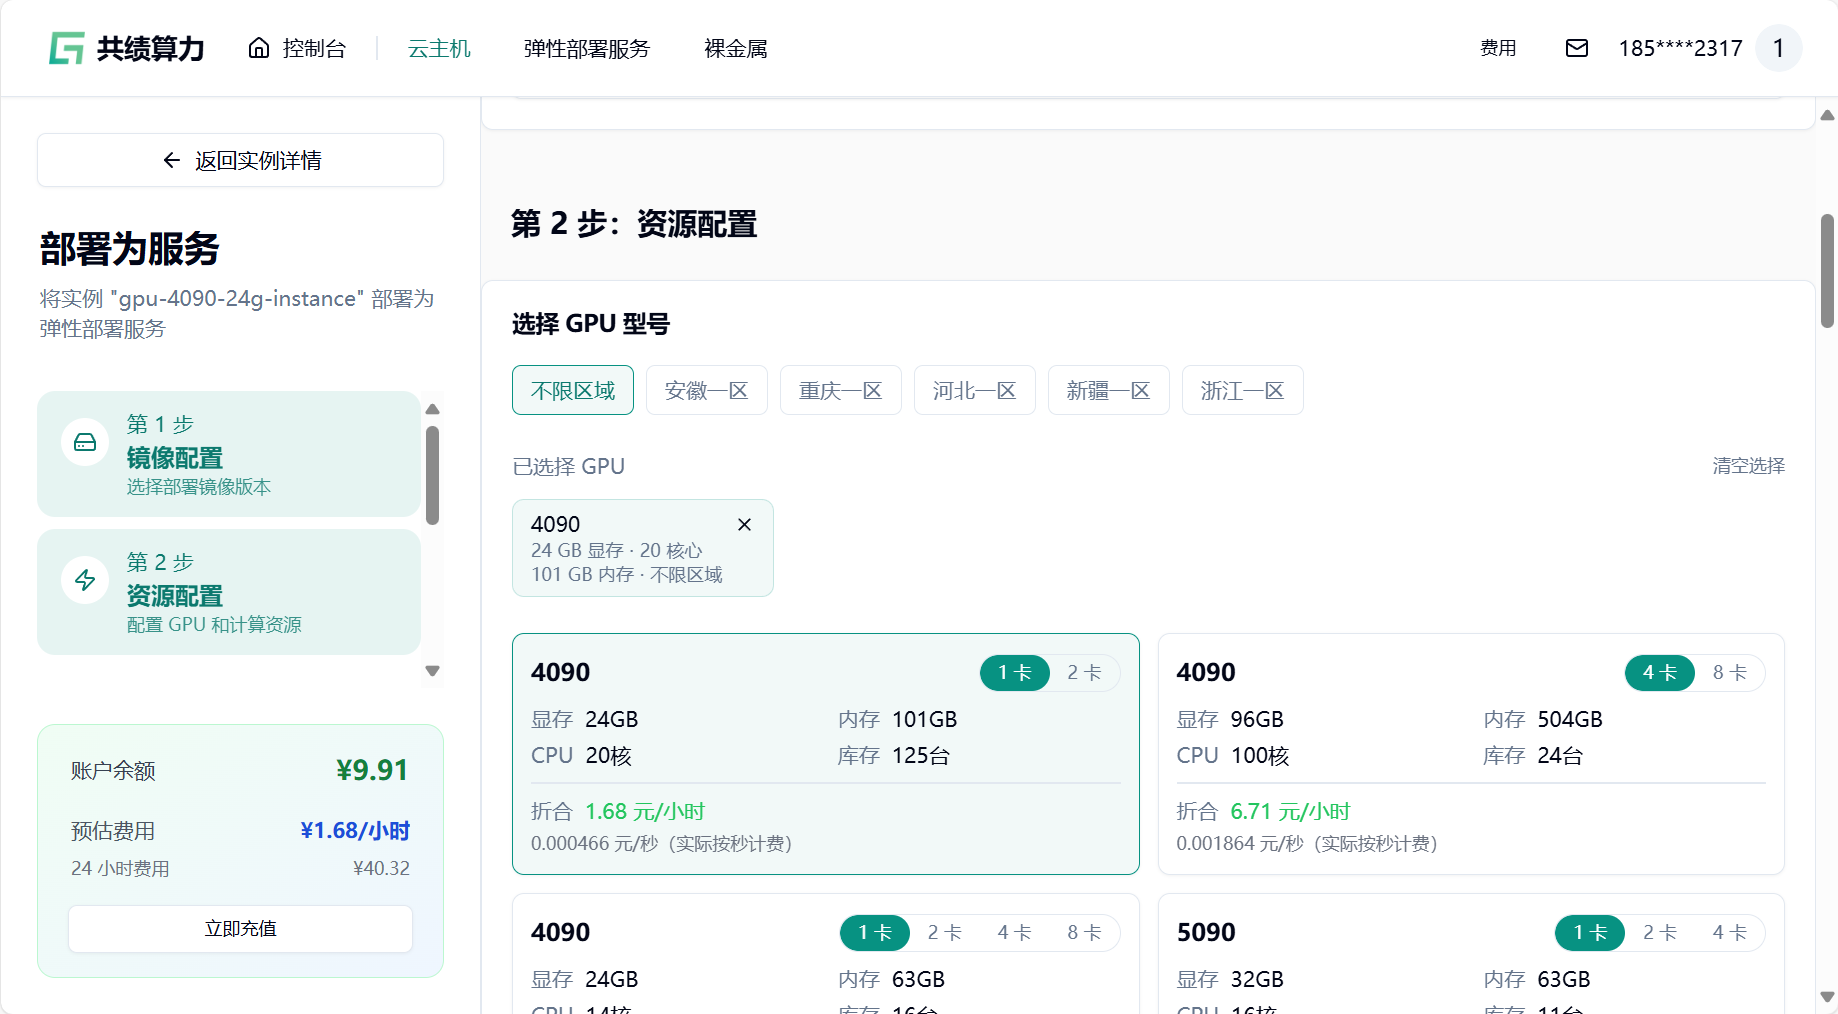
- 选择 GPU 配置(如 4090),节点默认选择 1 个
- 挂载存储卷
注意:挂载存储的时候,不要直接挂载到/、/root、 /root/目录,否则会出现一些奇怪的问题。建议挂载在类似/root/data、/root/code 之类的二级目录。

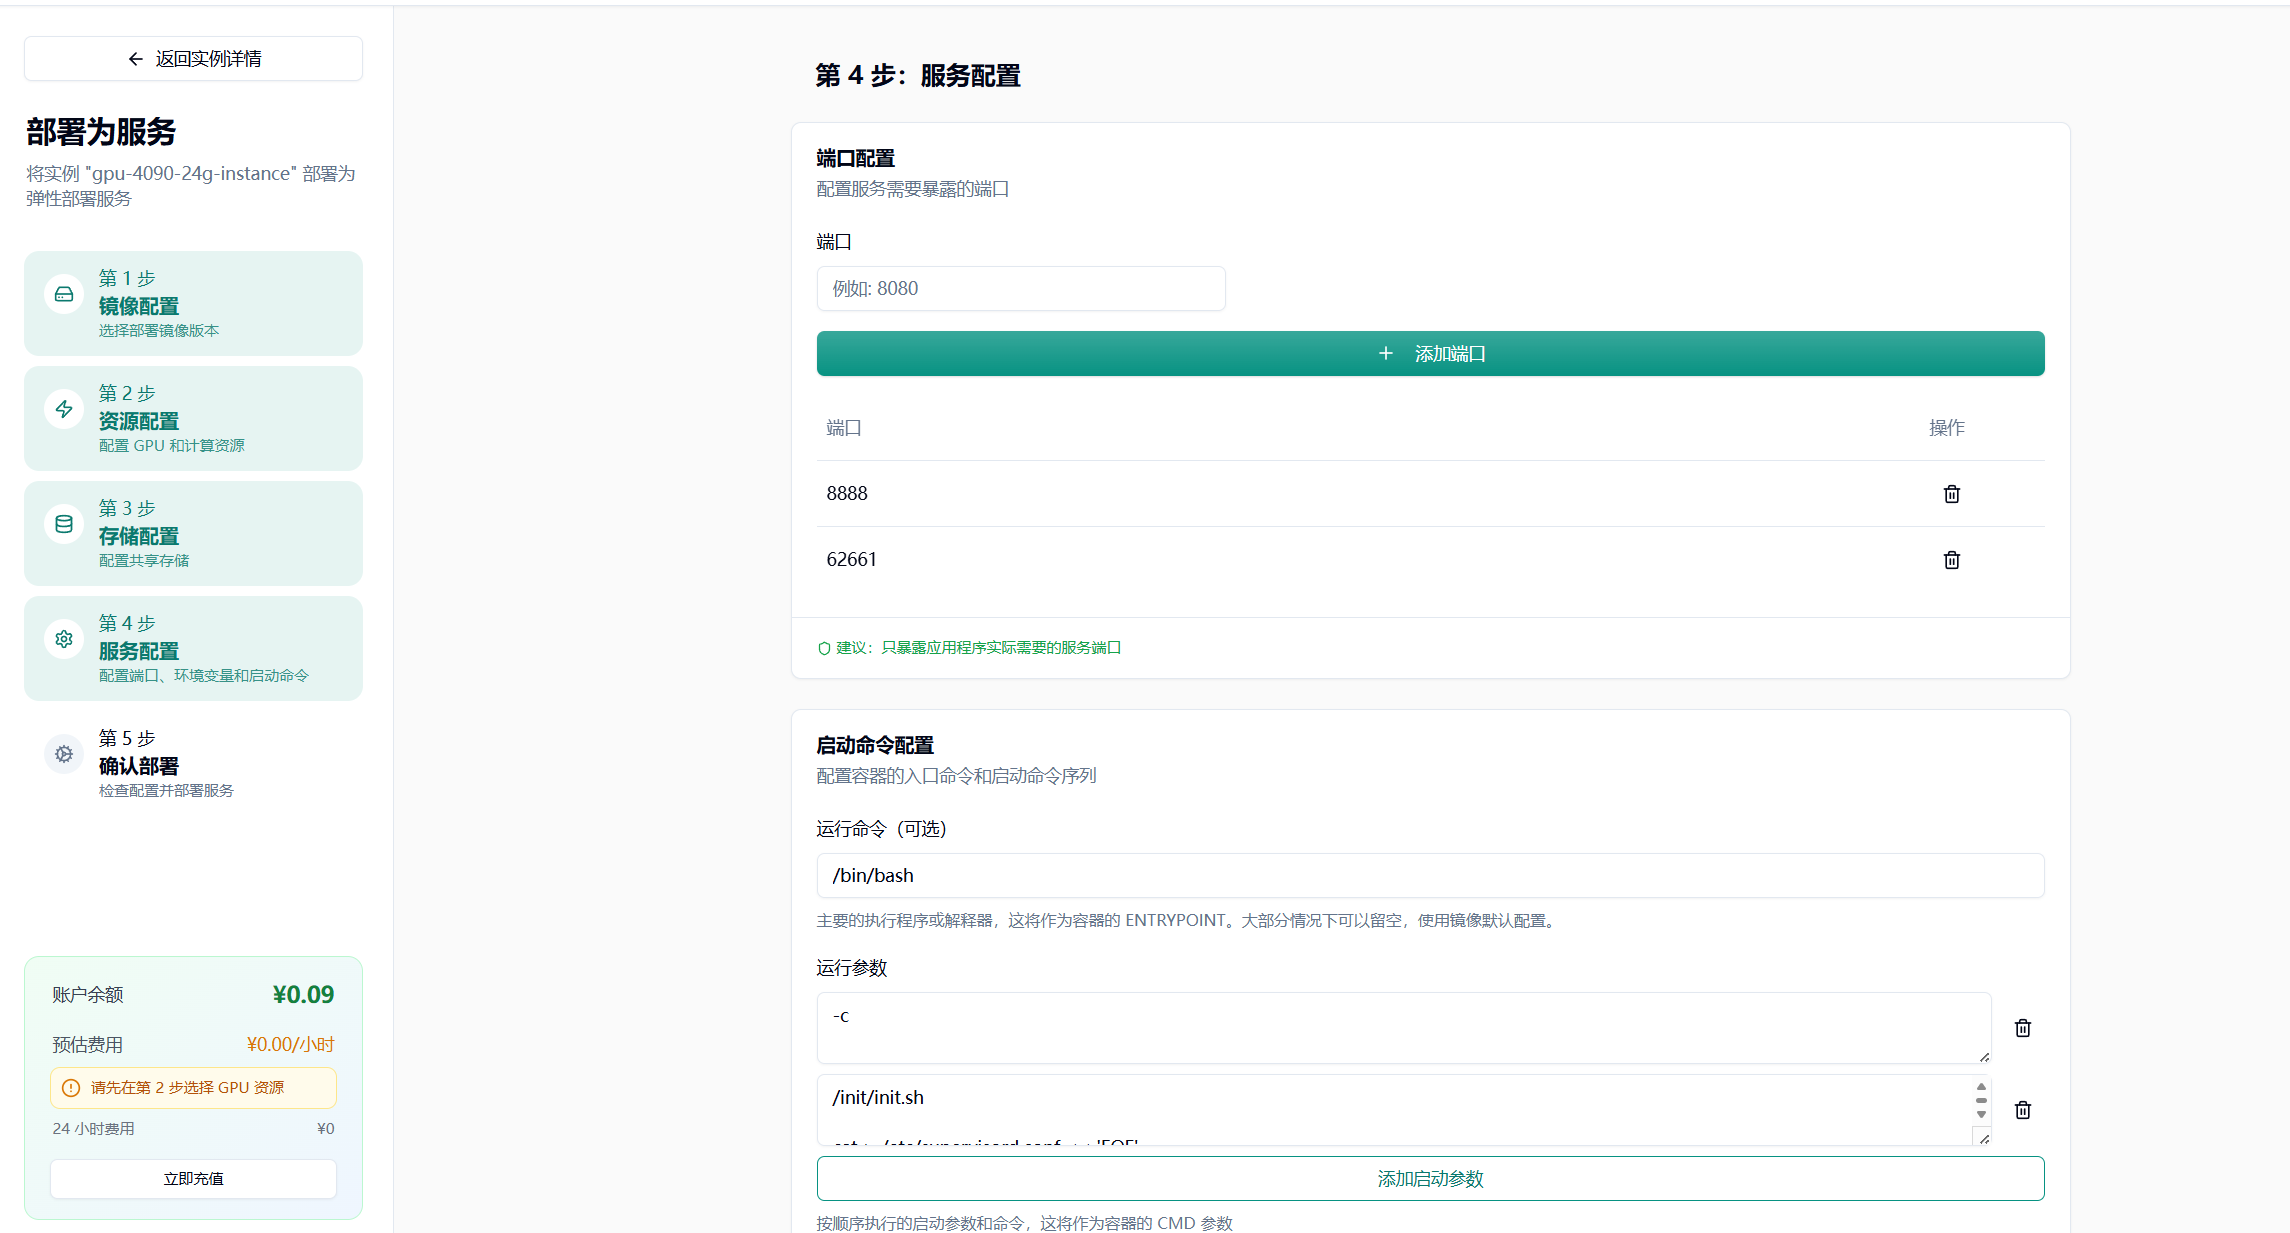
其他配置根据自己镜像的需要来进行配置
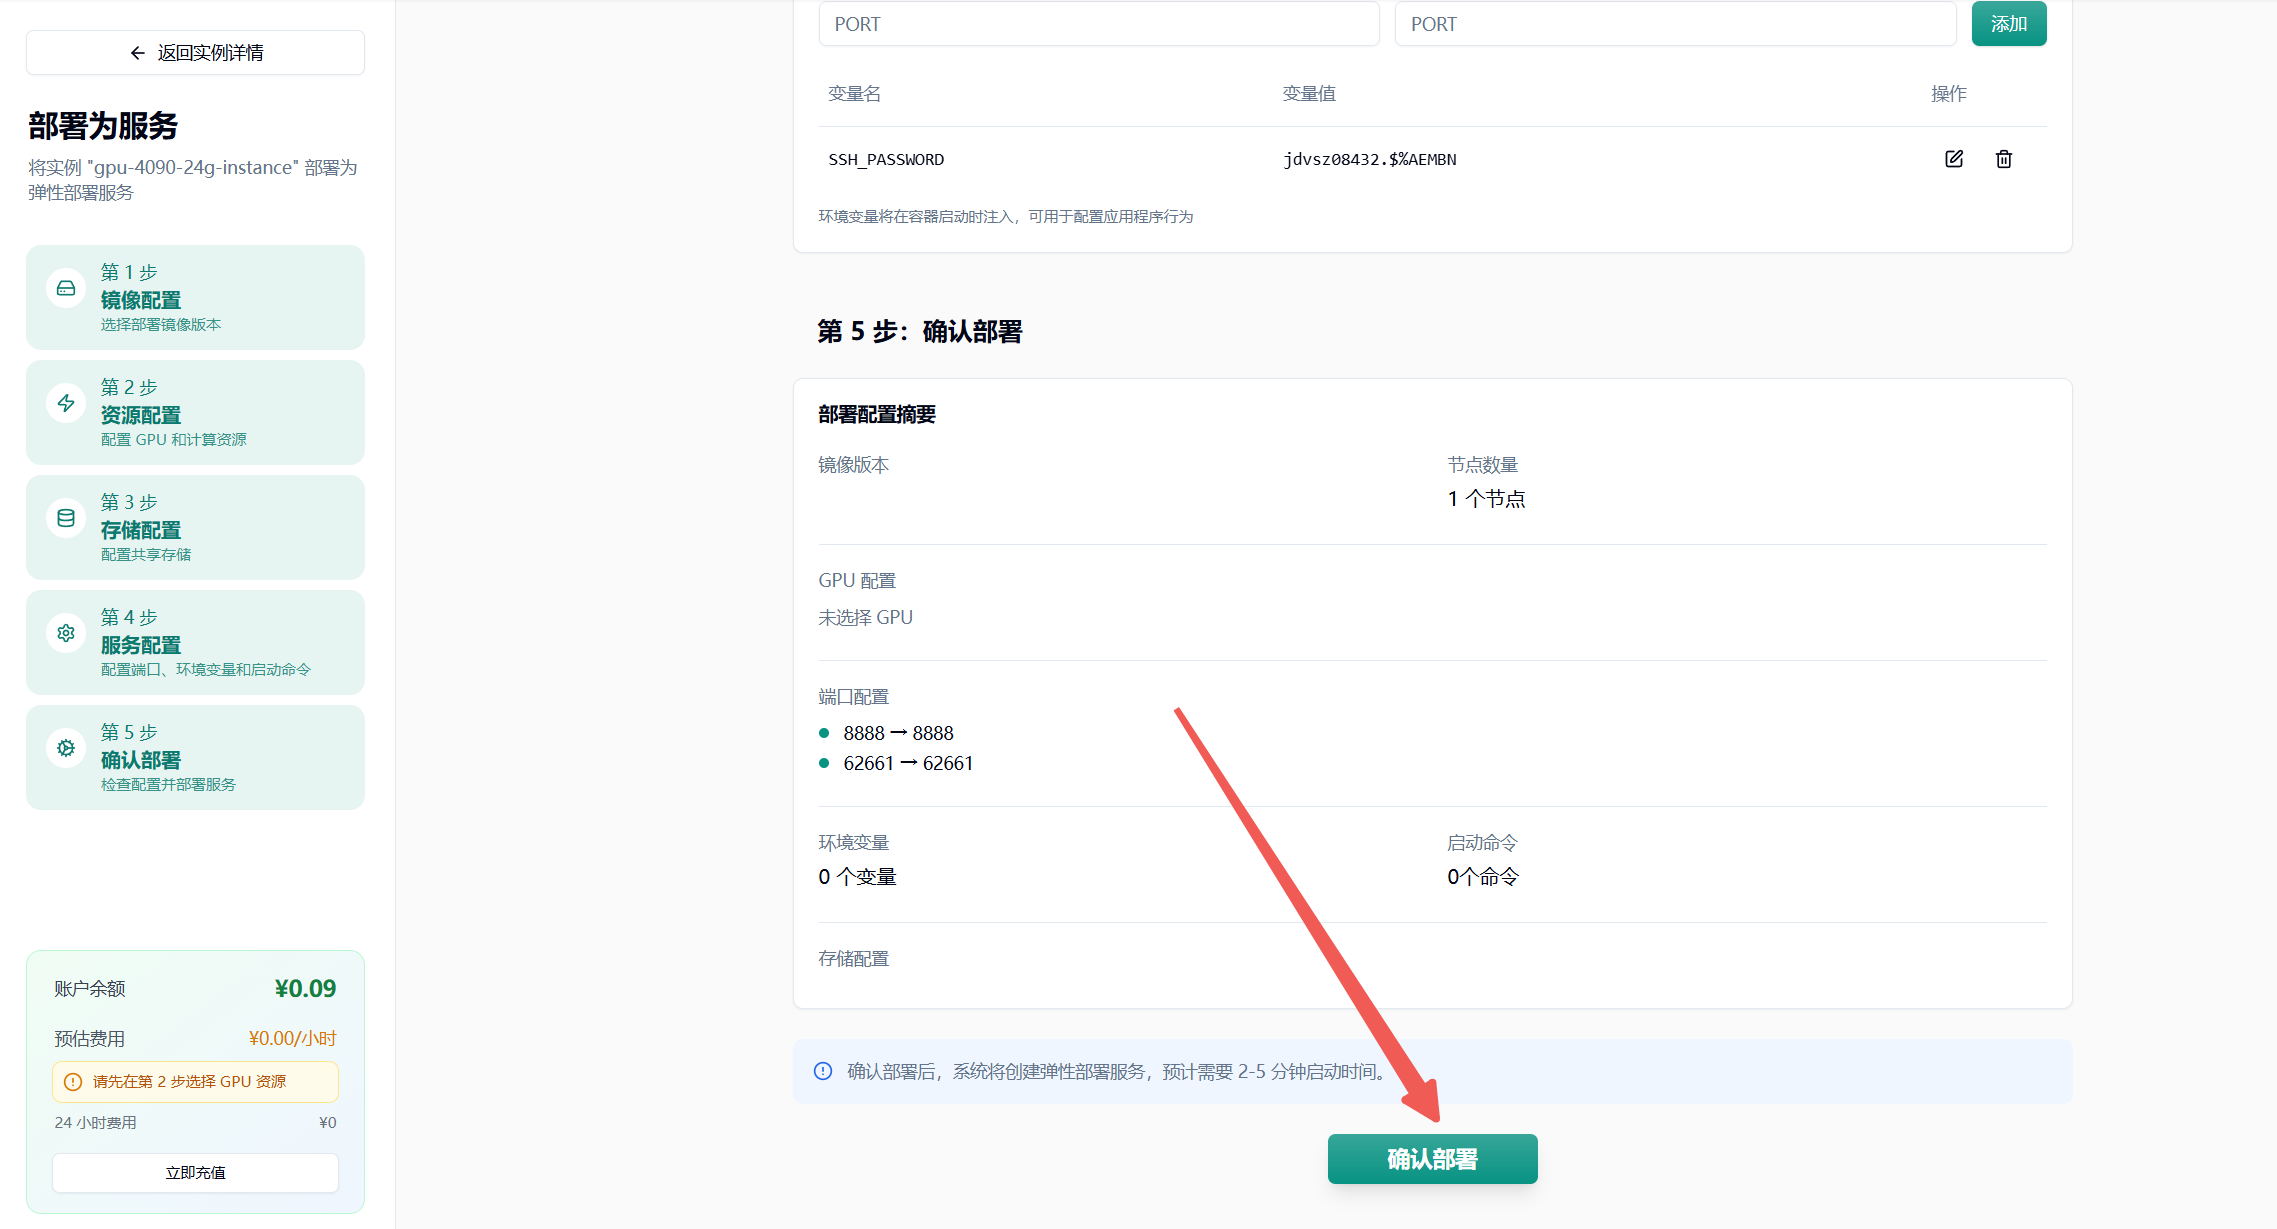
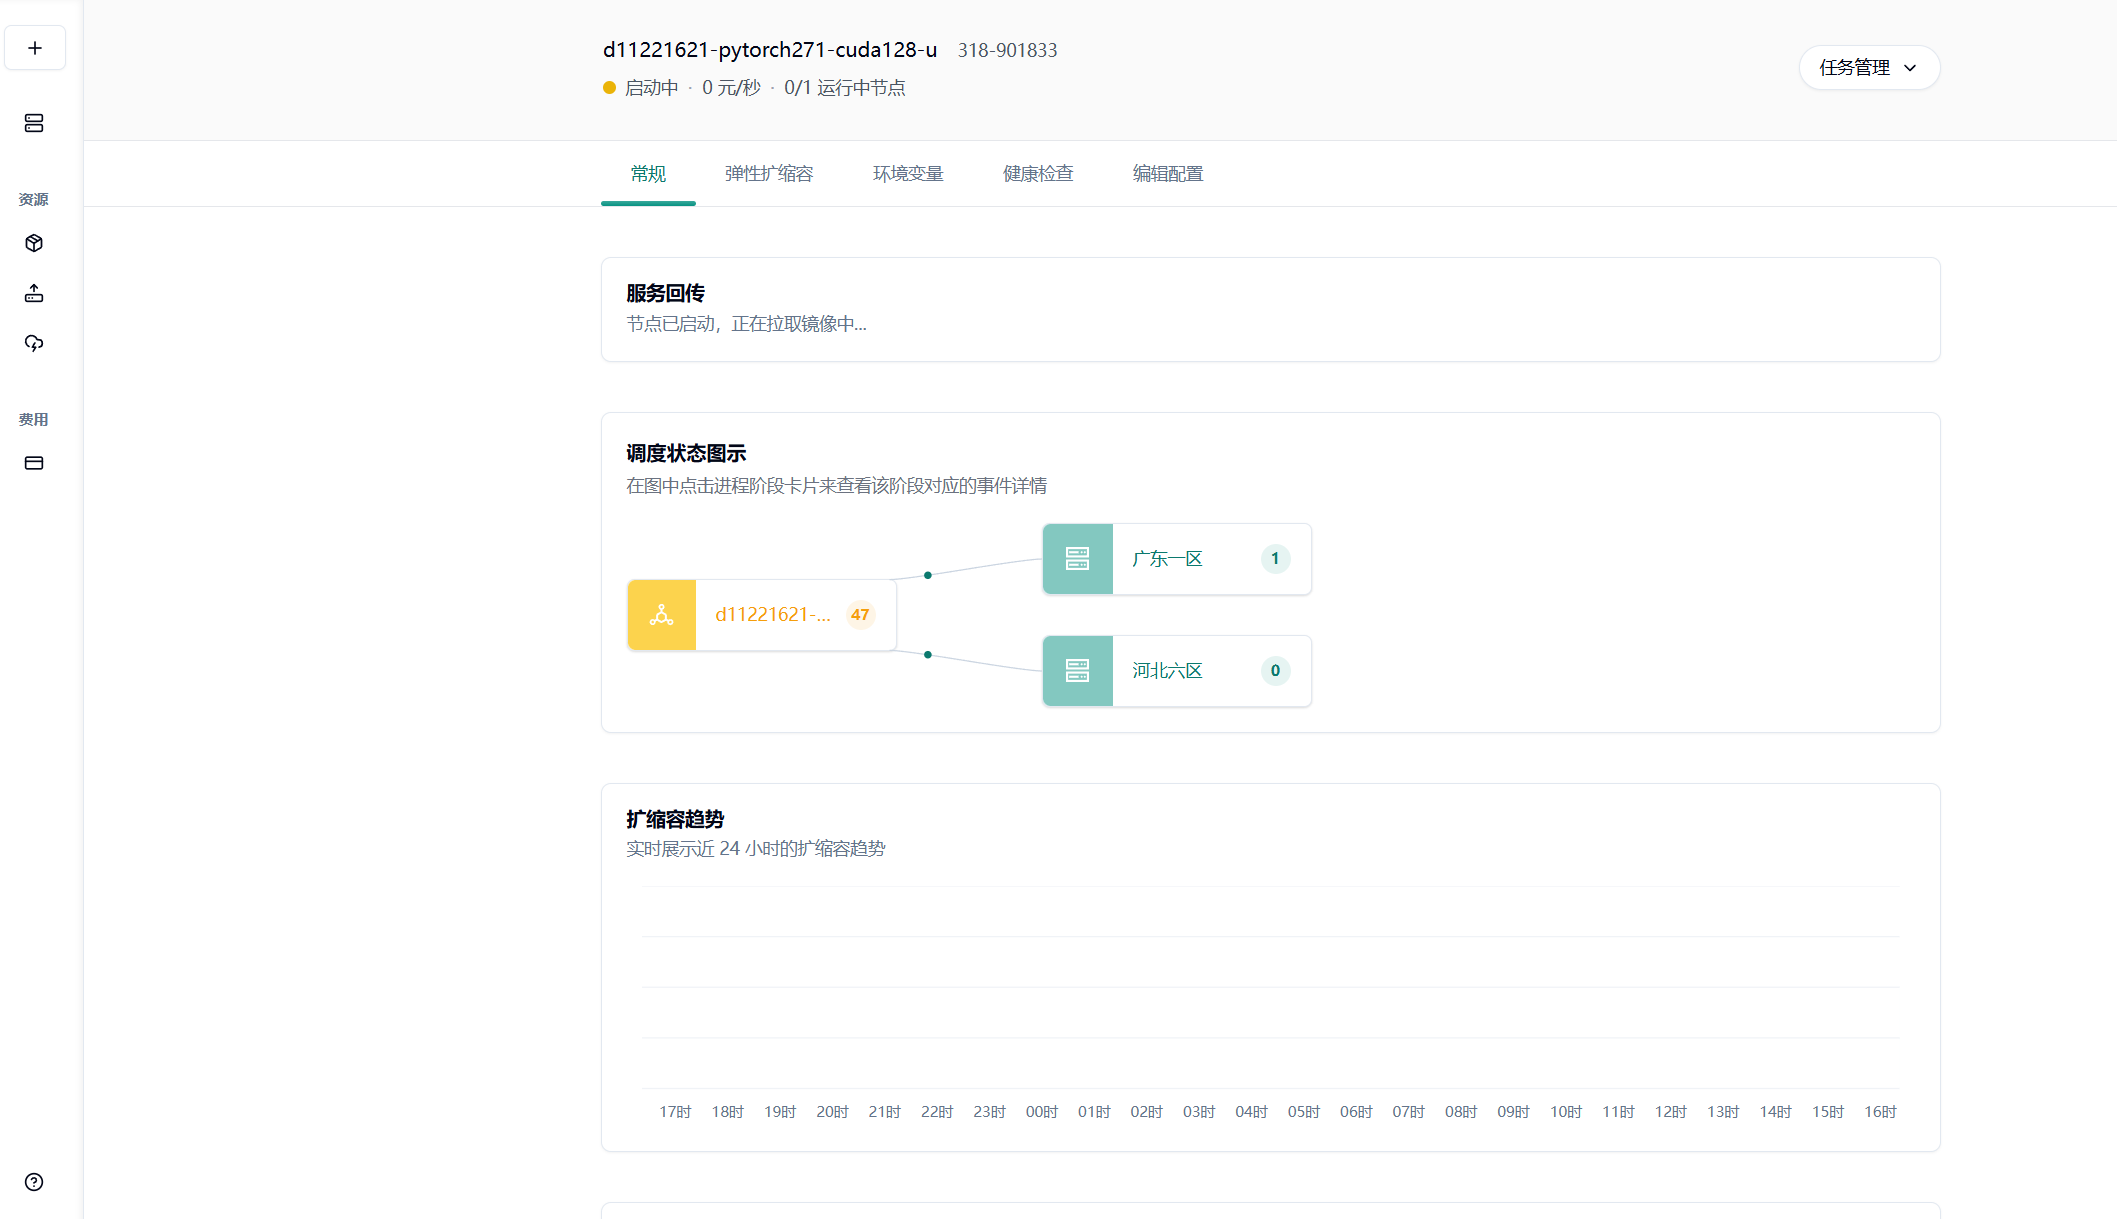
- 点击最下方“确认部署”即可,若无问题则会进入节点拉取界面,耐心等待即可
具体的自动弹性扩缩容设置可以参考这篇使用文档:
参数设置建议
最小节点数:建议设置为 1,避免冷启动影响。如果业务对响应时间要求极高,可以适当增加。
最大节点数:根据预算和业务峰值合理设置。建议先从小值开始,观察实际使用情况后逐步调整。
队列延迟阈值:建议设置为 4-10 秒,平衡成本和体验。对于实时性要求高的任务,可以设置较小值。
空闲超时时间:建议设置为 300-600 秒,减少冷启动影响的同时控制成本。
附录 1 对象存储加速中放置模型
Section titled “附录 1 对象存储加速中放置模型”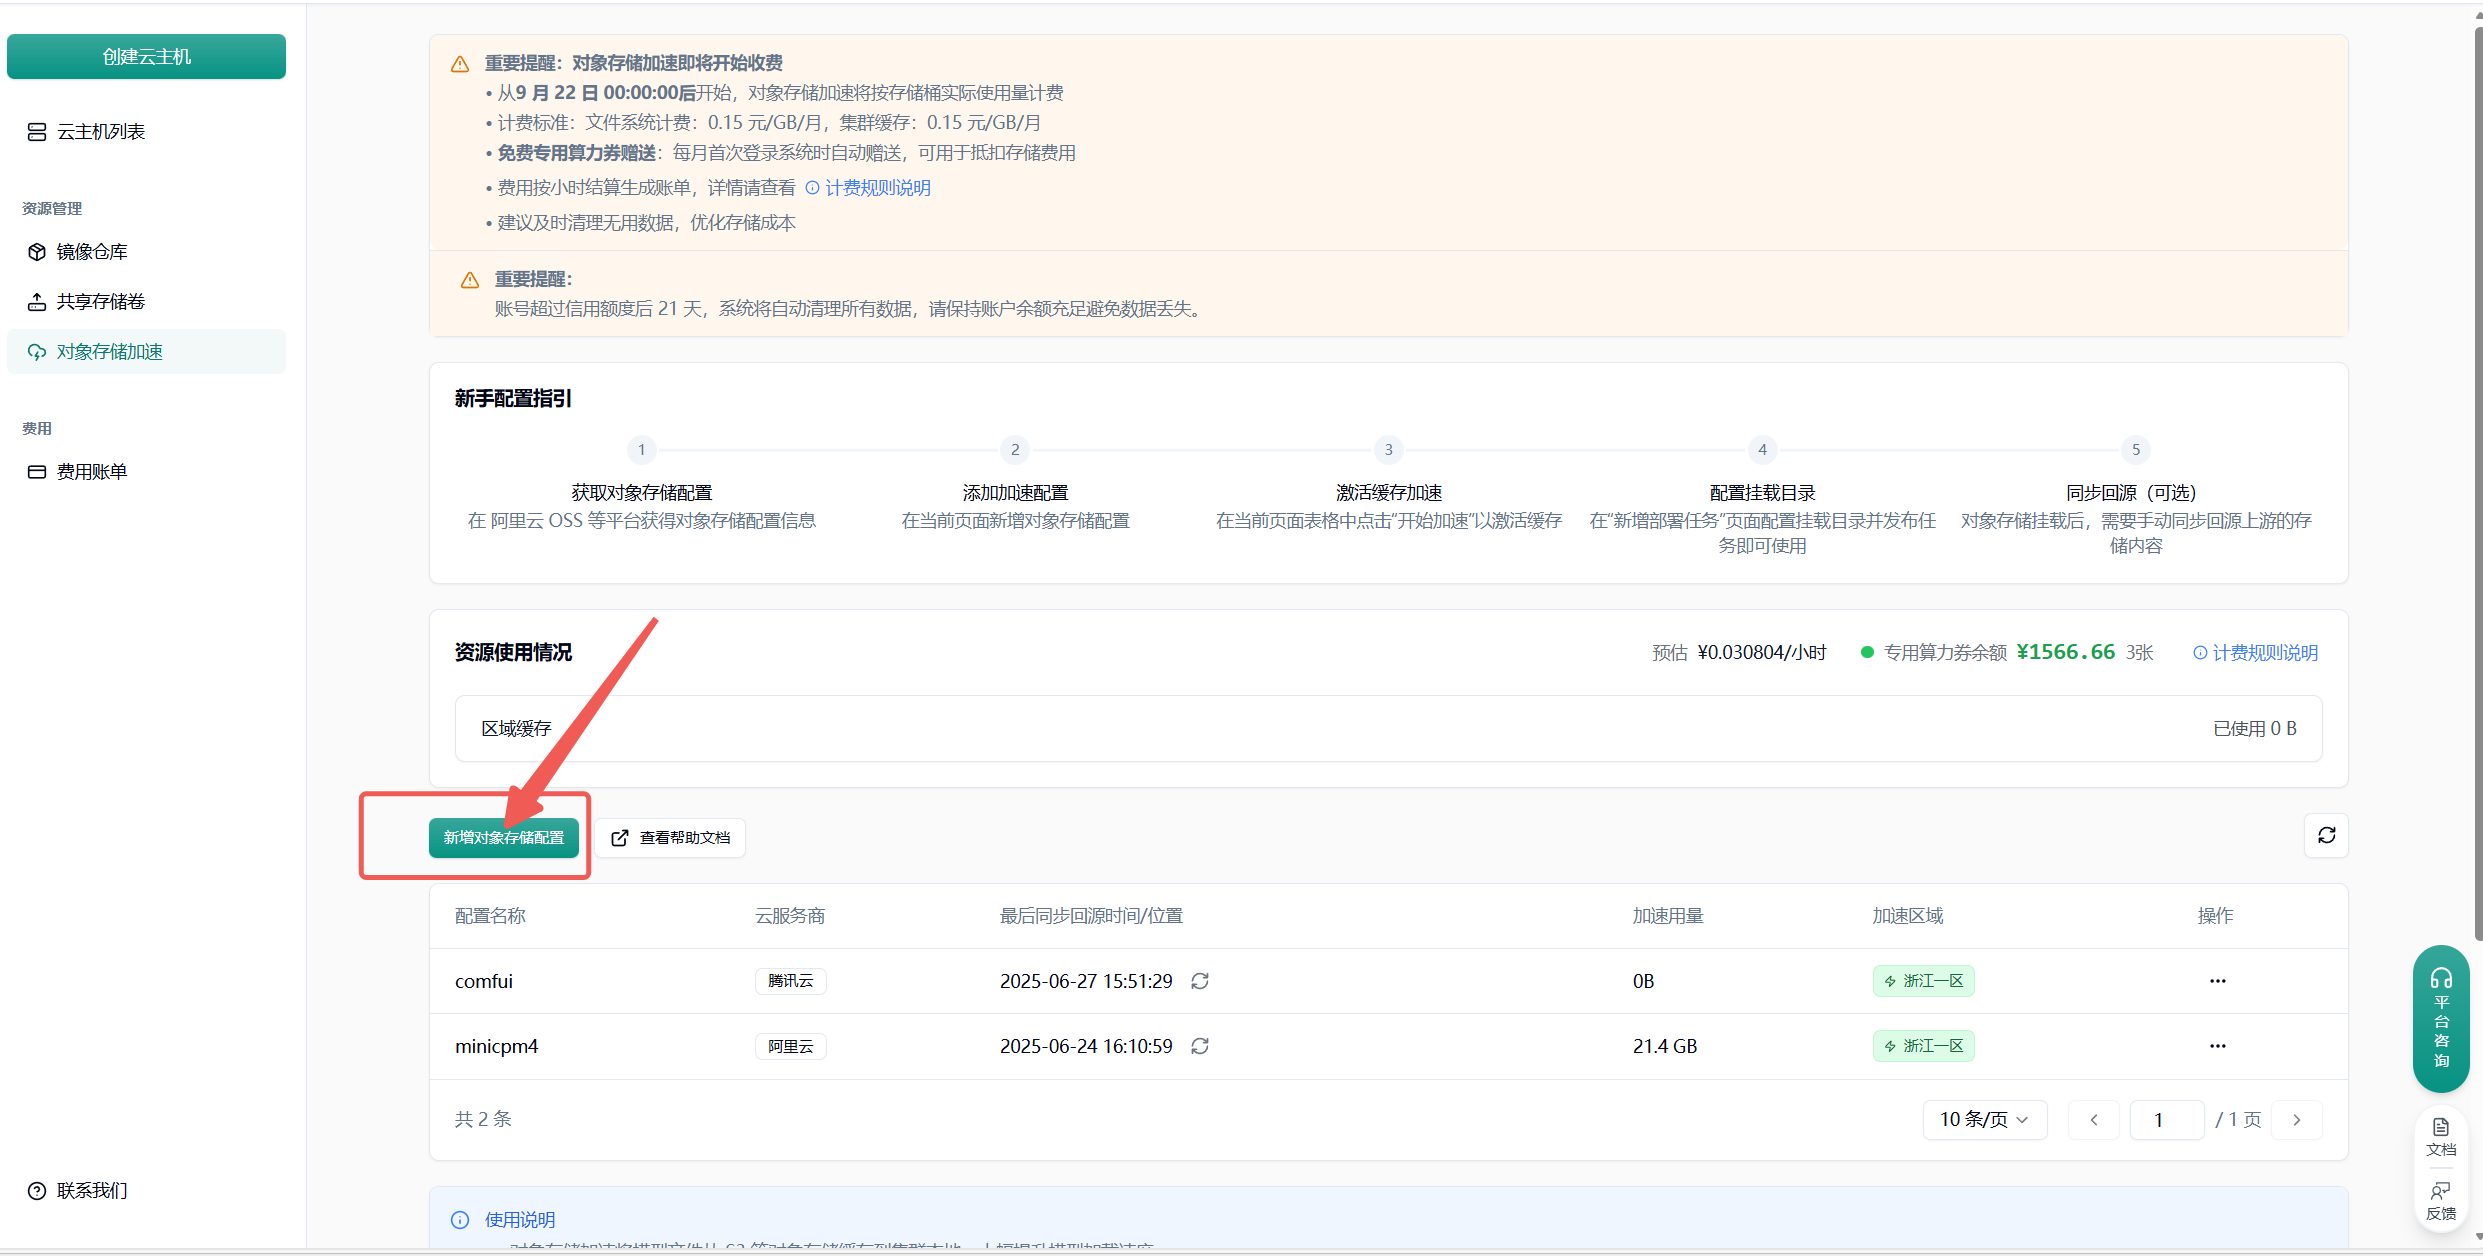
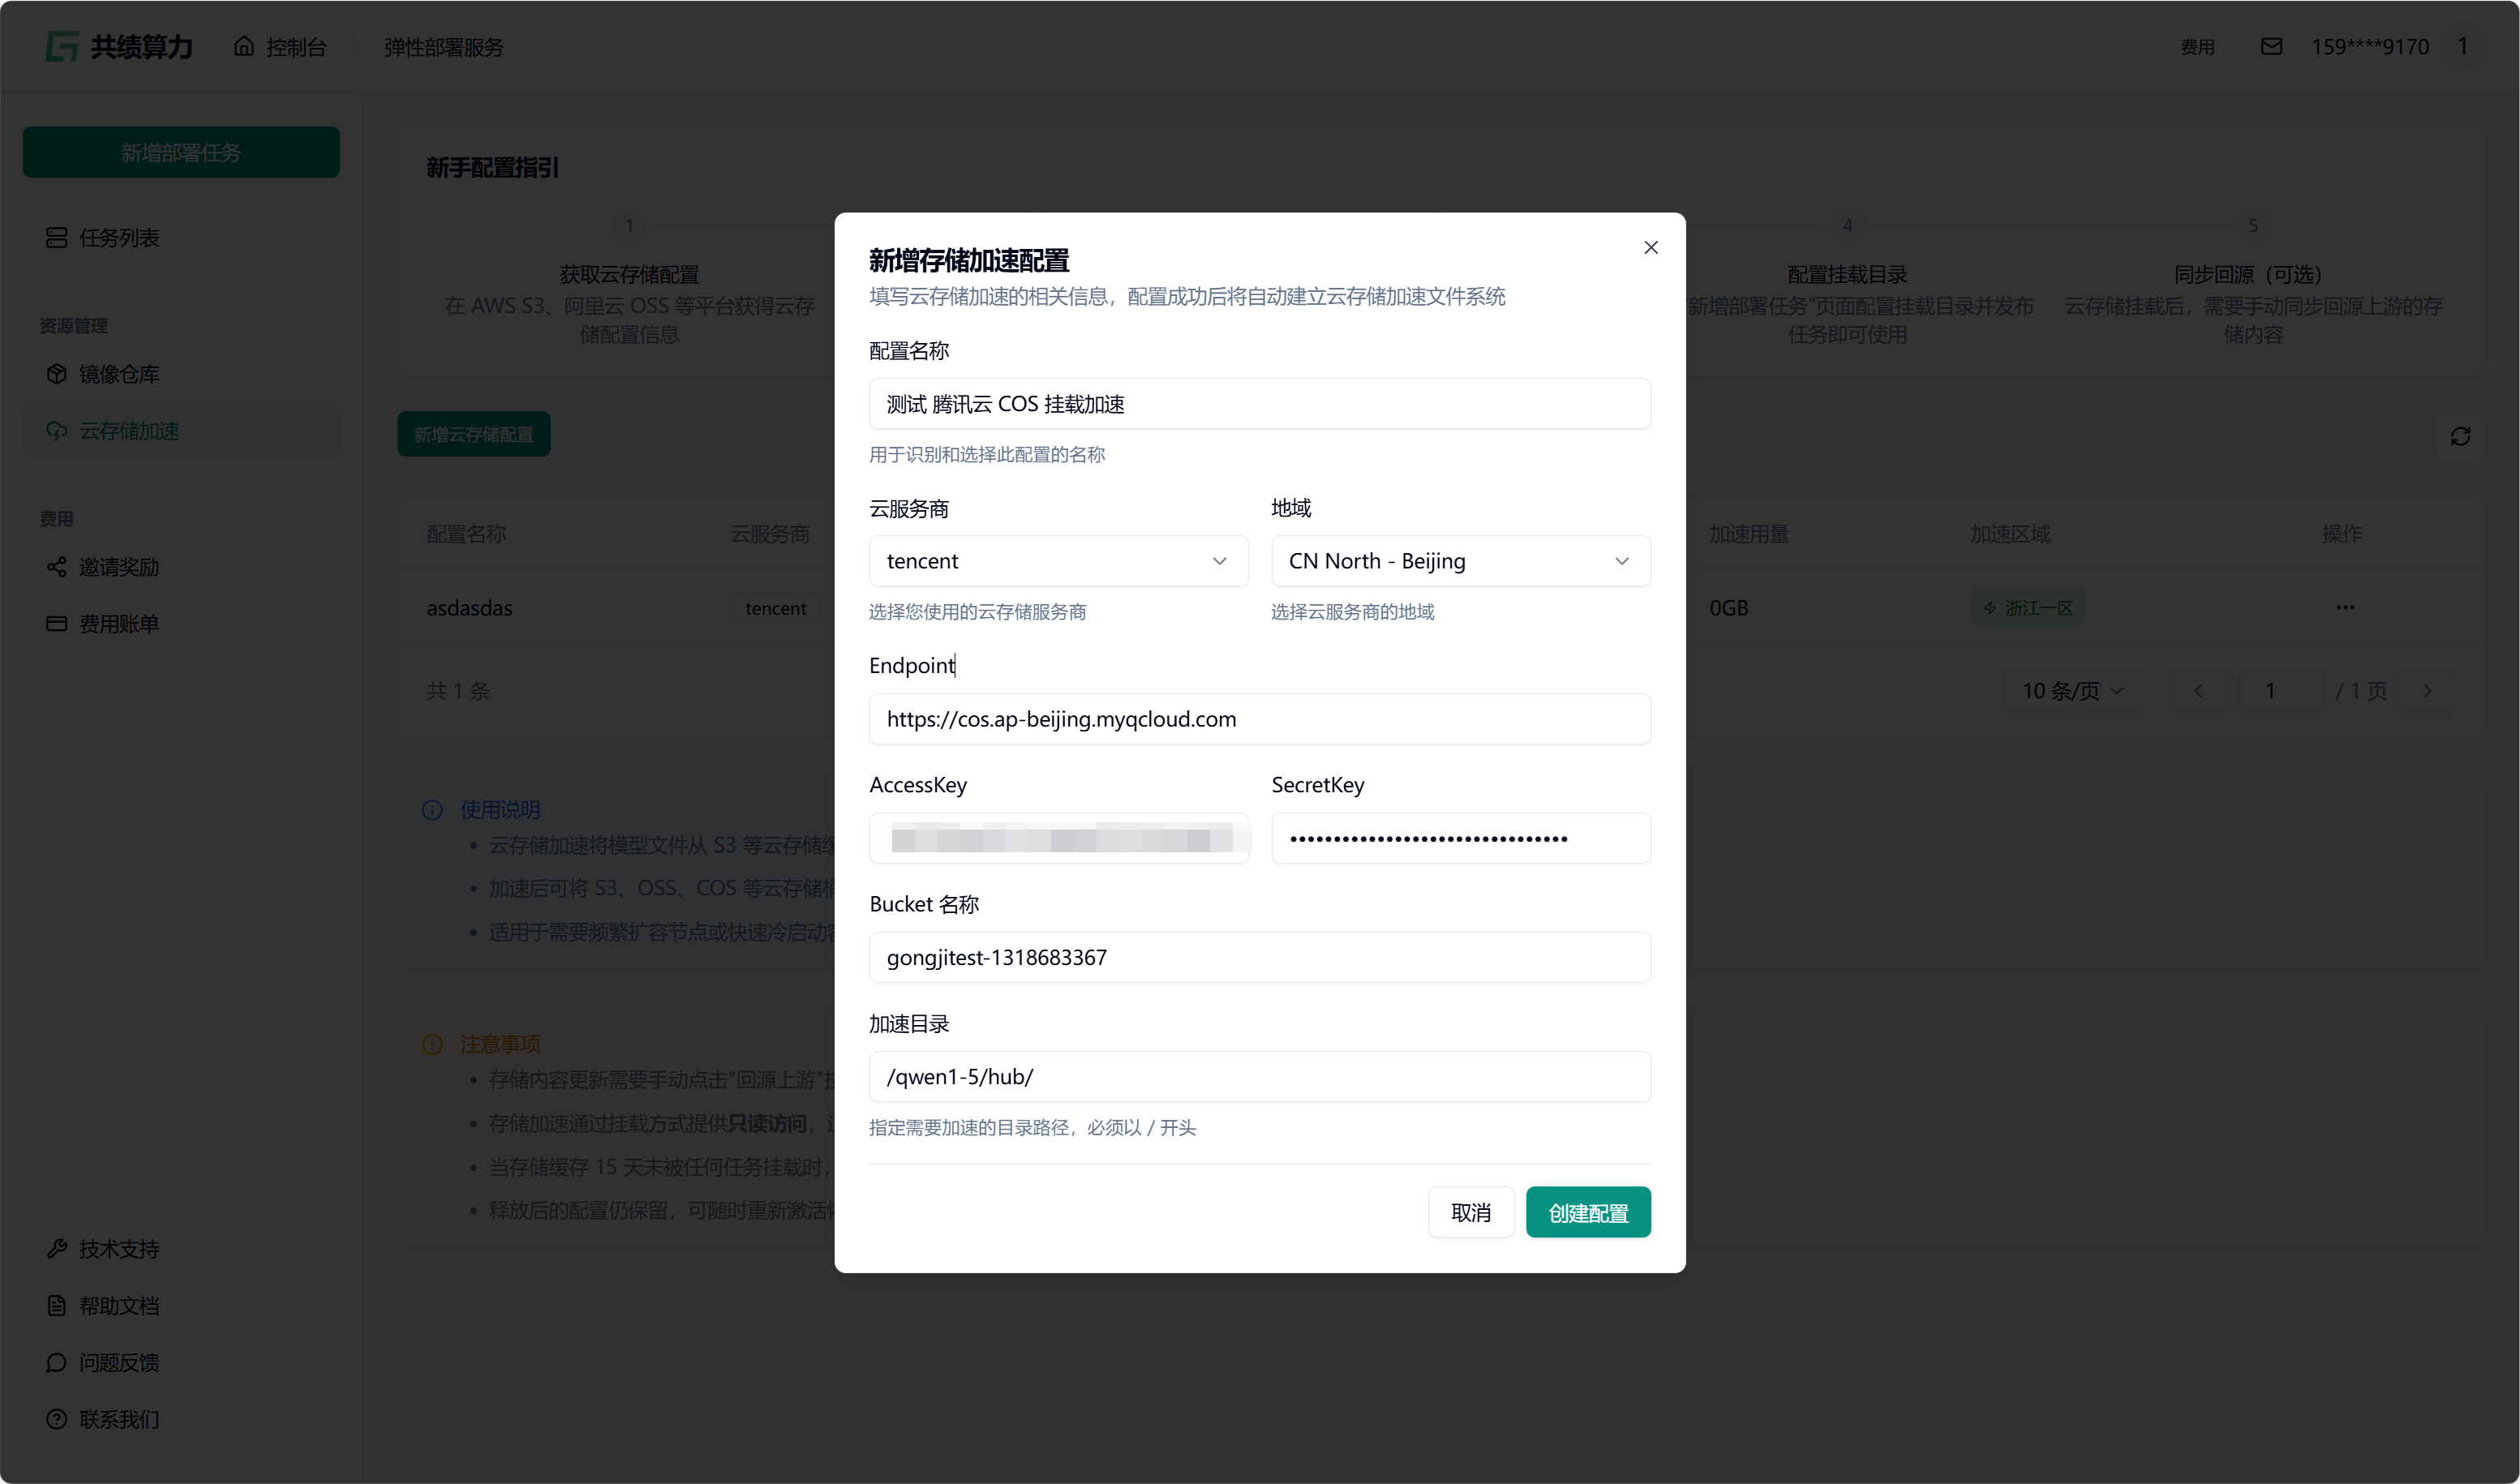
点击”新增对象存储配置”按钮,选择云服务商,填写以下信息:
- 配置名称
- 对象存储:服务商、地域、Endpoint(不能带 Bucket)、AccessKey、SecretKey、Bucket 名称
- 加速目录:Bucket 中需进行加速处理的目录(不建议挂载根目录,因这会致使根目录下所有文件被缓存,占用大量空间,且不利于业务的合理分割)
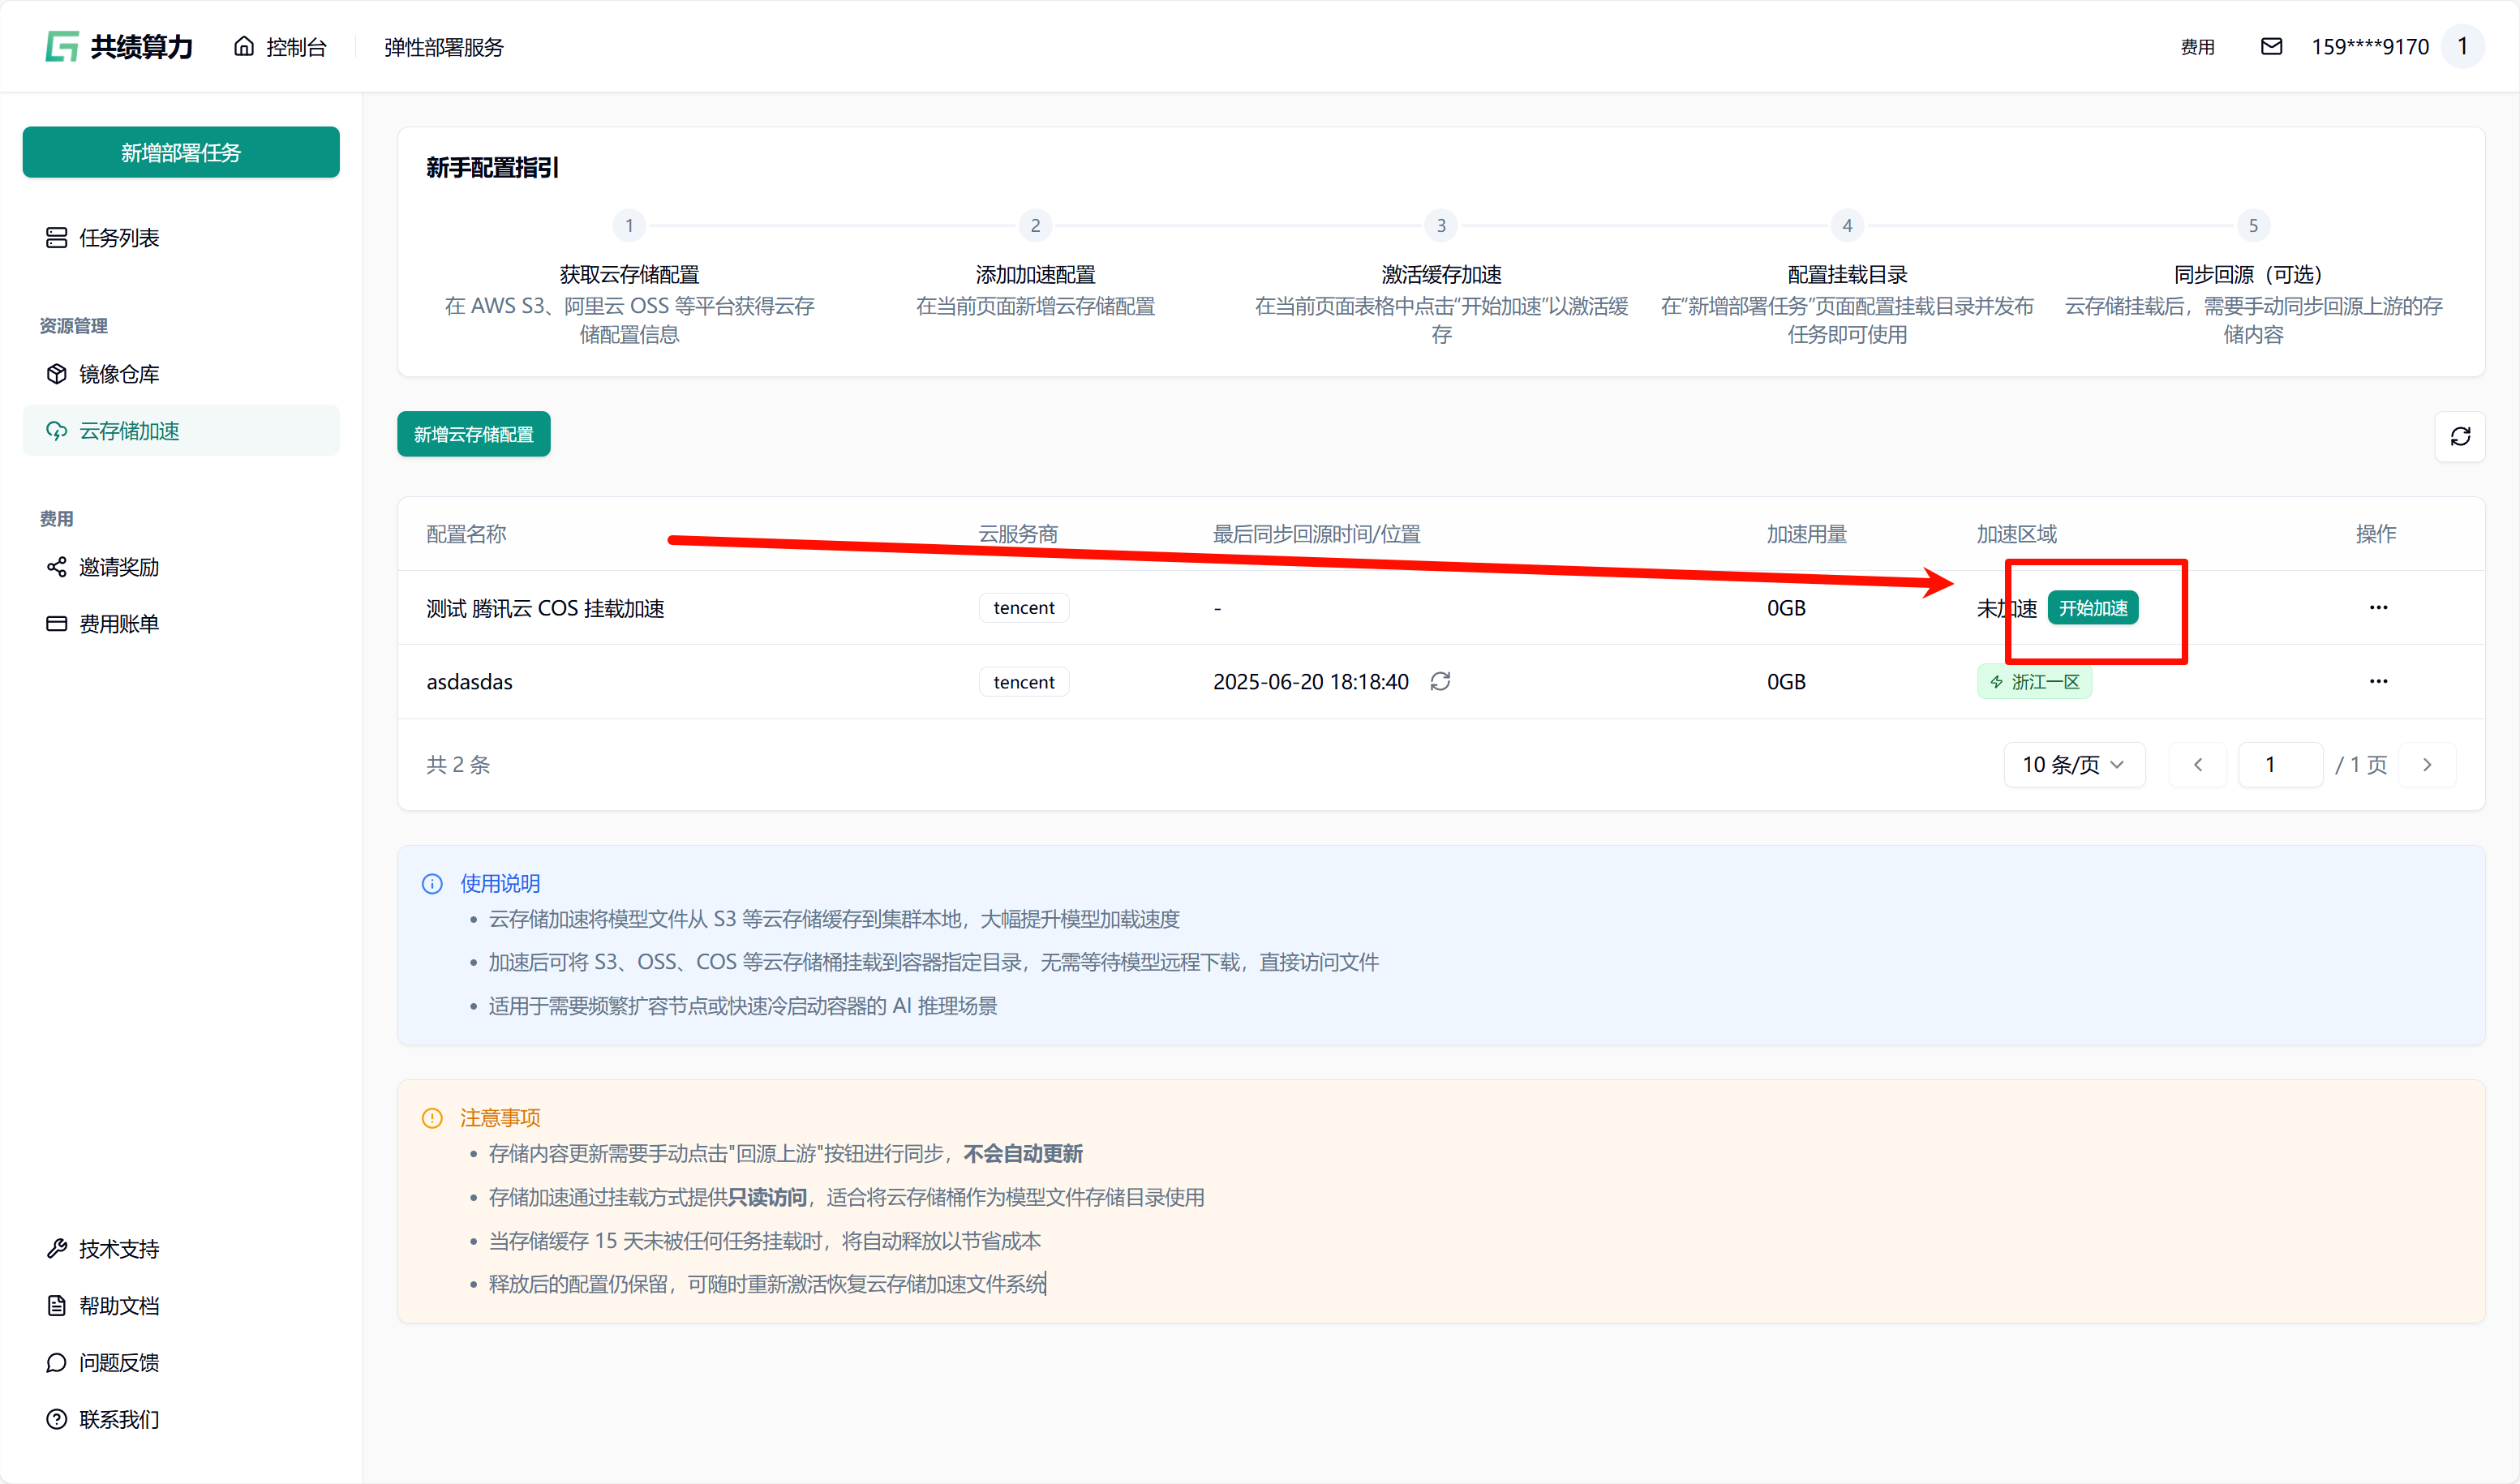
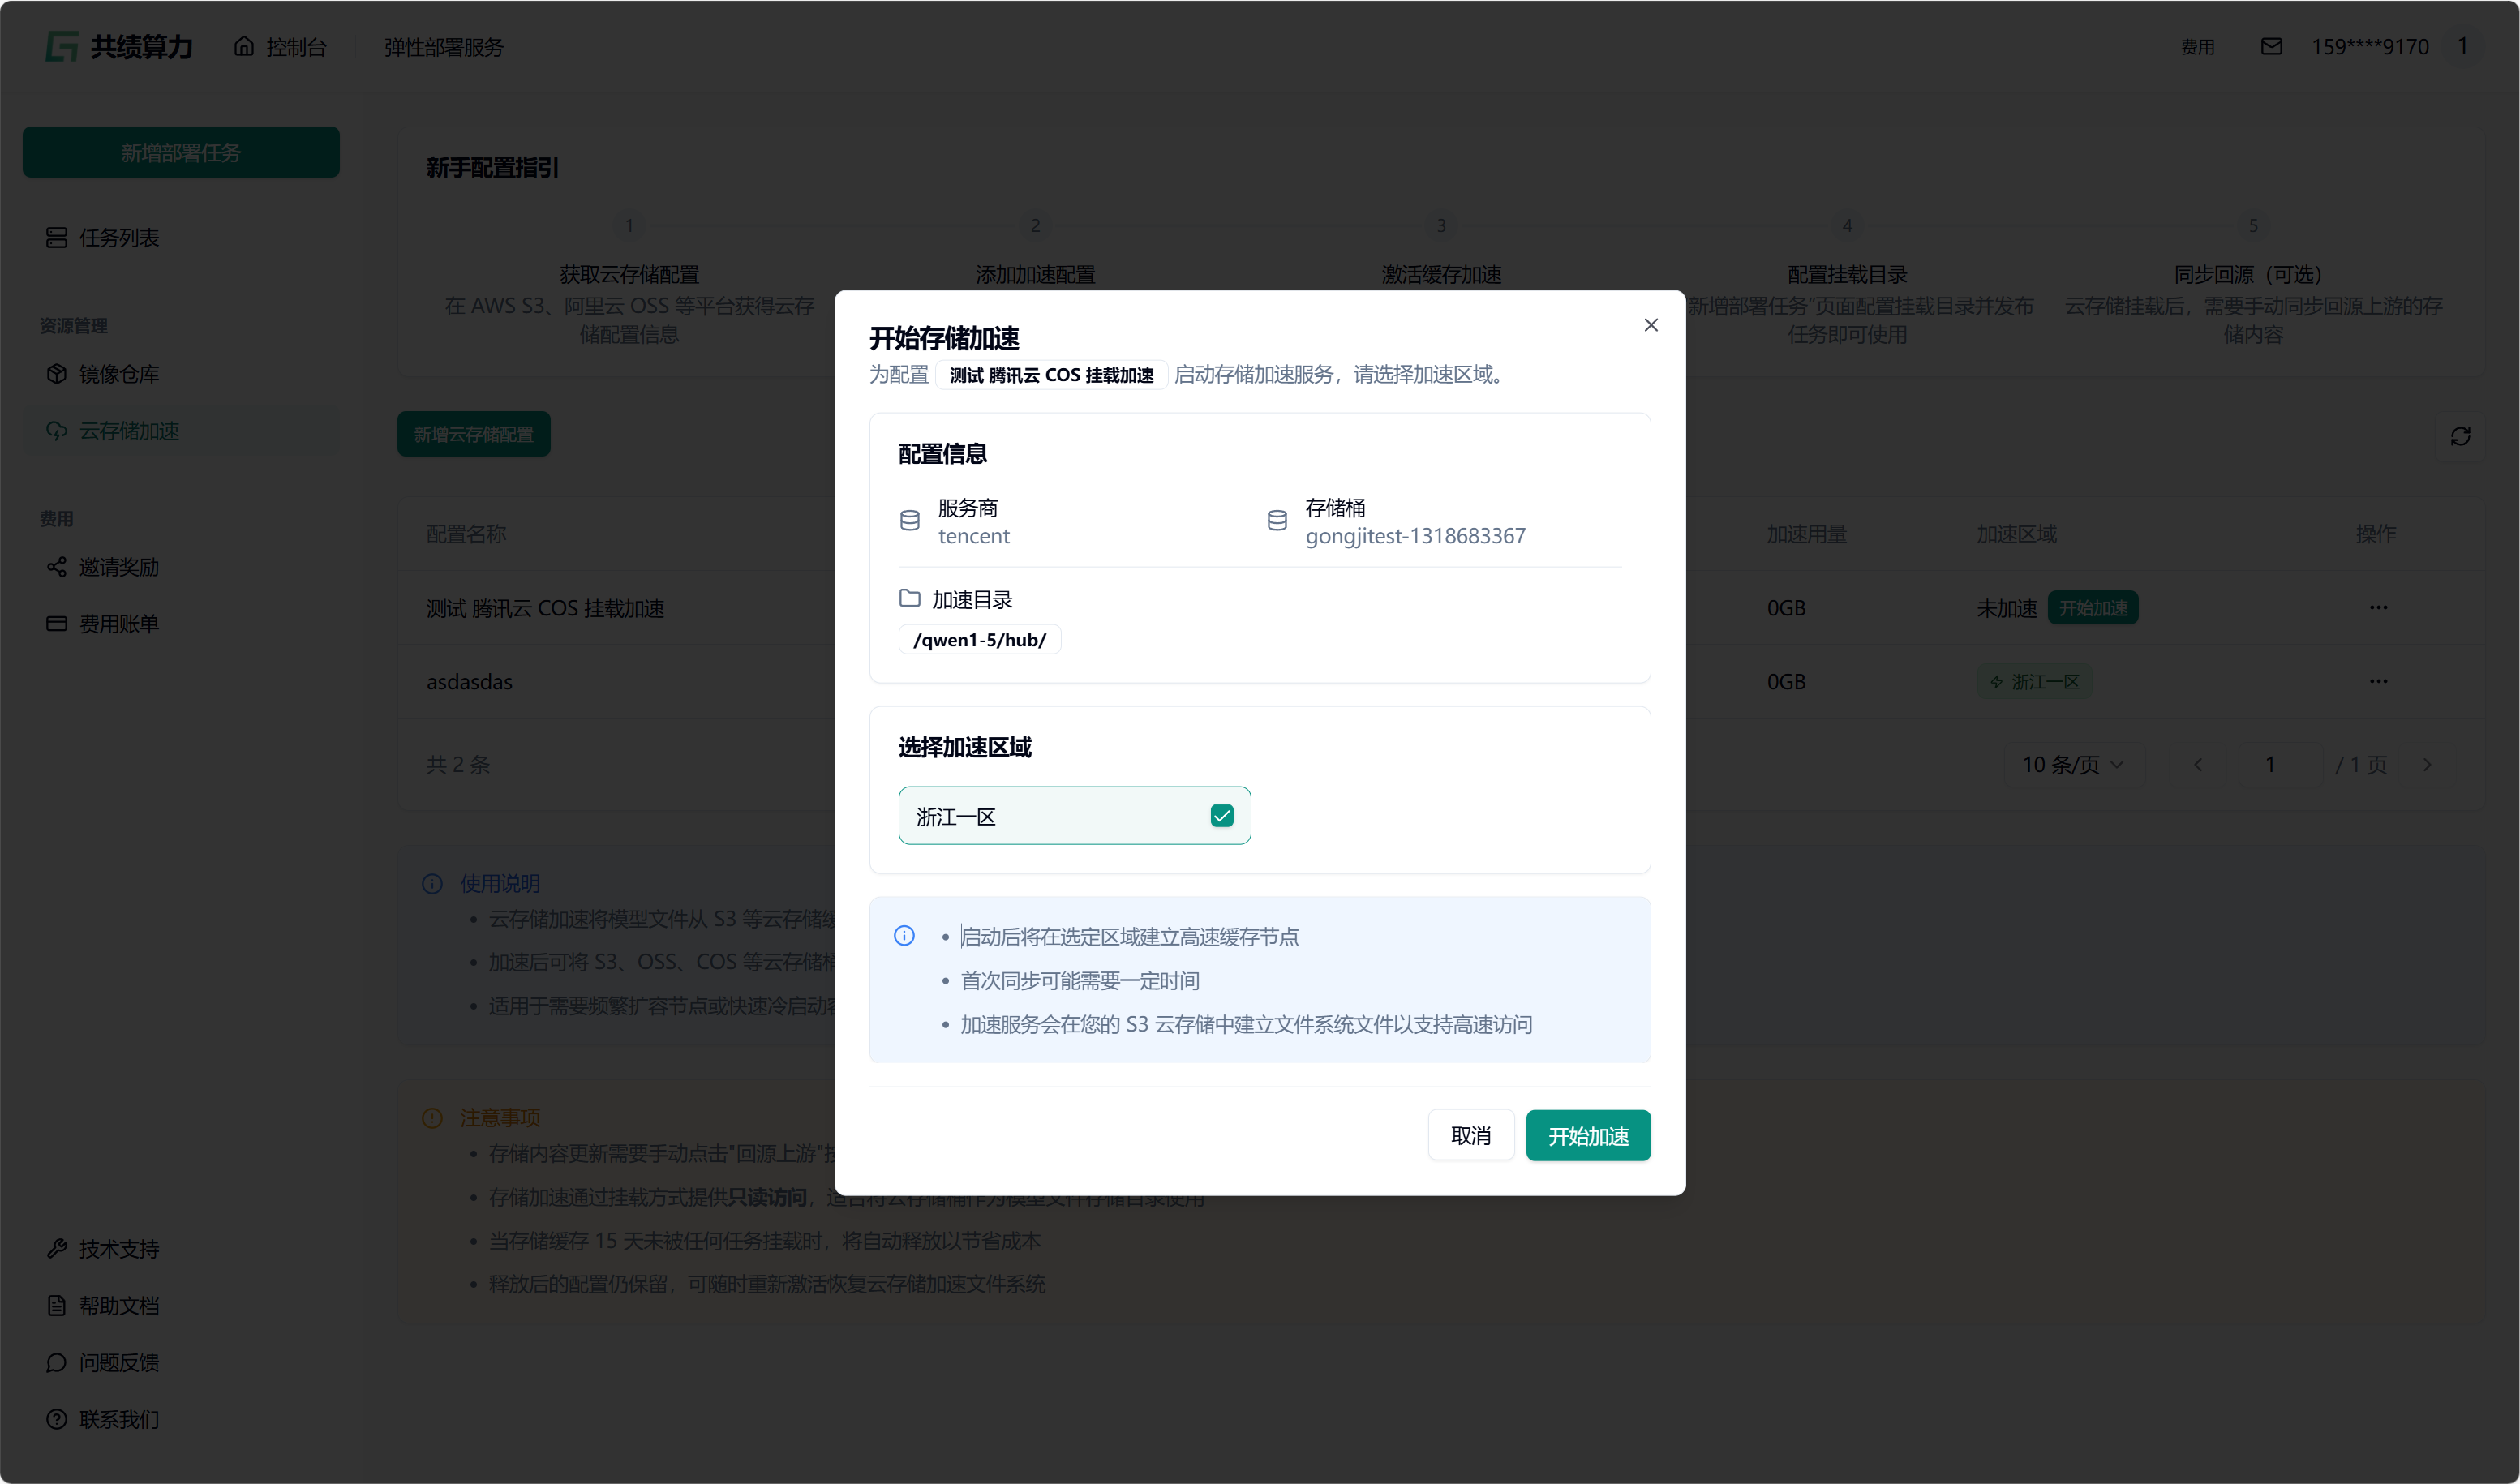
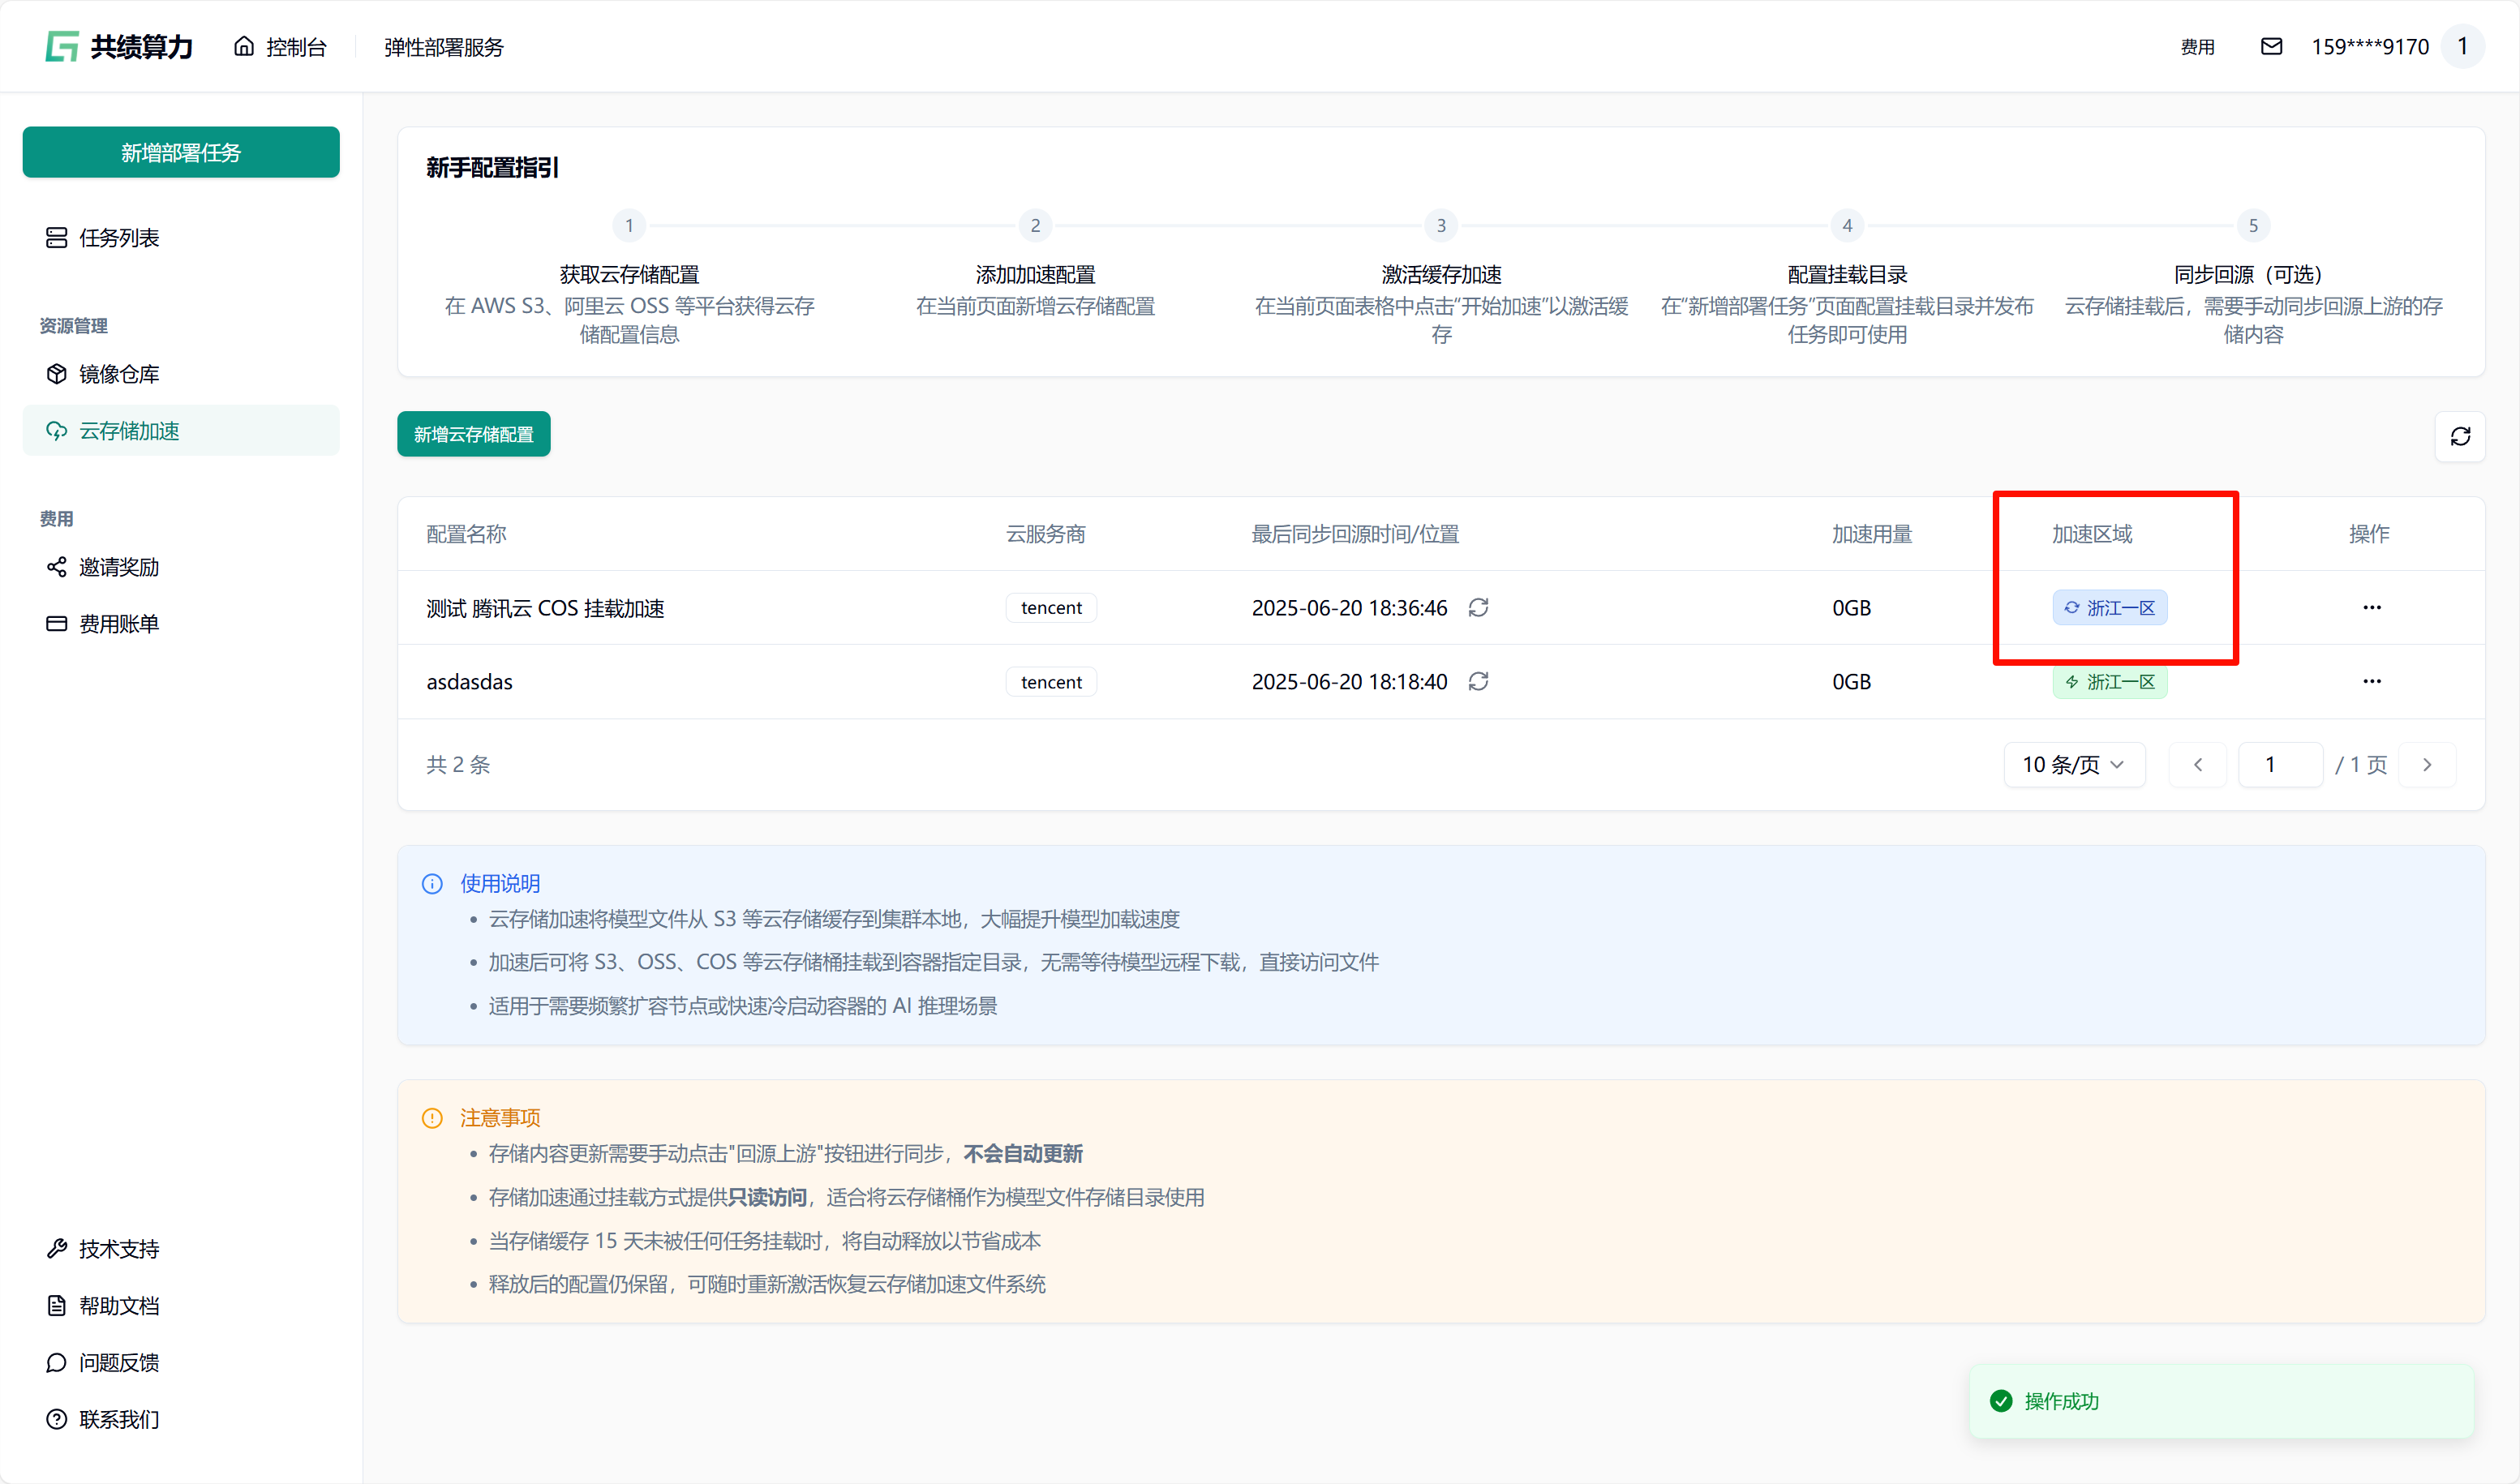
当执行保存配置操作时,系统会自动对配置的可用性进行检测。只有在校验通过之后,配置才可成功保存。在列表中查找到相应配置后,点击“开始加速”选项,接着选择加速区域,此时系统将自动对 JuiceFS 文件系统进行初始化(此过程约需 1 - 2 分钟,期间状态会从蓝色转变为绿色,状态为绿色时已可以挂载此存储桶)。同时,系统还会执行提前预热操作(此操作需从云端将文件下载至本地,因此需等待一定时长。例如,若文件大小为 6.6 G,下载完成大约需要 30 分钟)。
任务发布时挂载
先选择 GPU、GPU 区域(需要与对象存储选择的加速区域一致)。我的对象存储加速了“浙江一区”,所以我选择“浙江一区”的 4090 GPU。
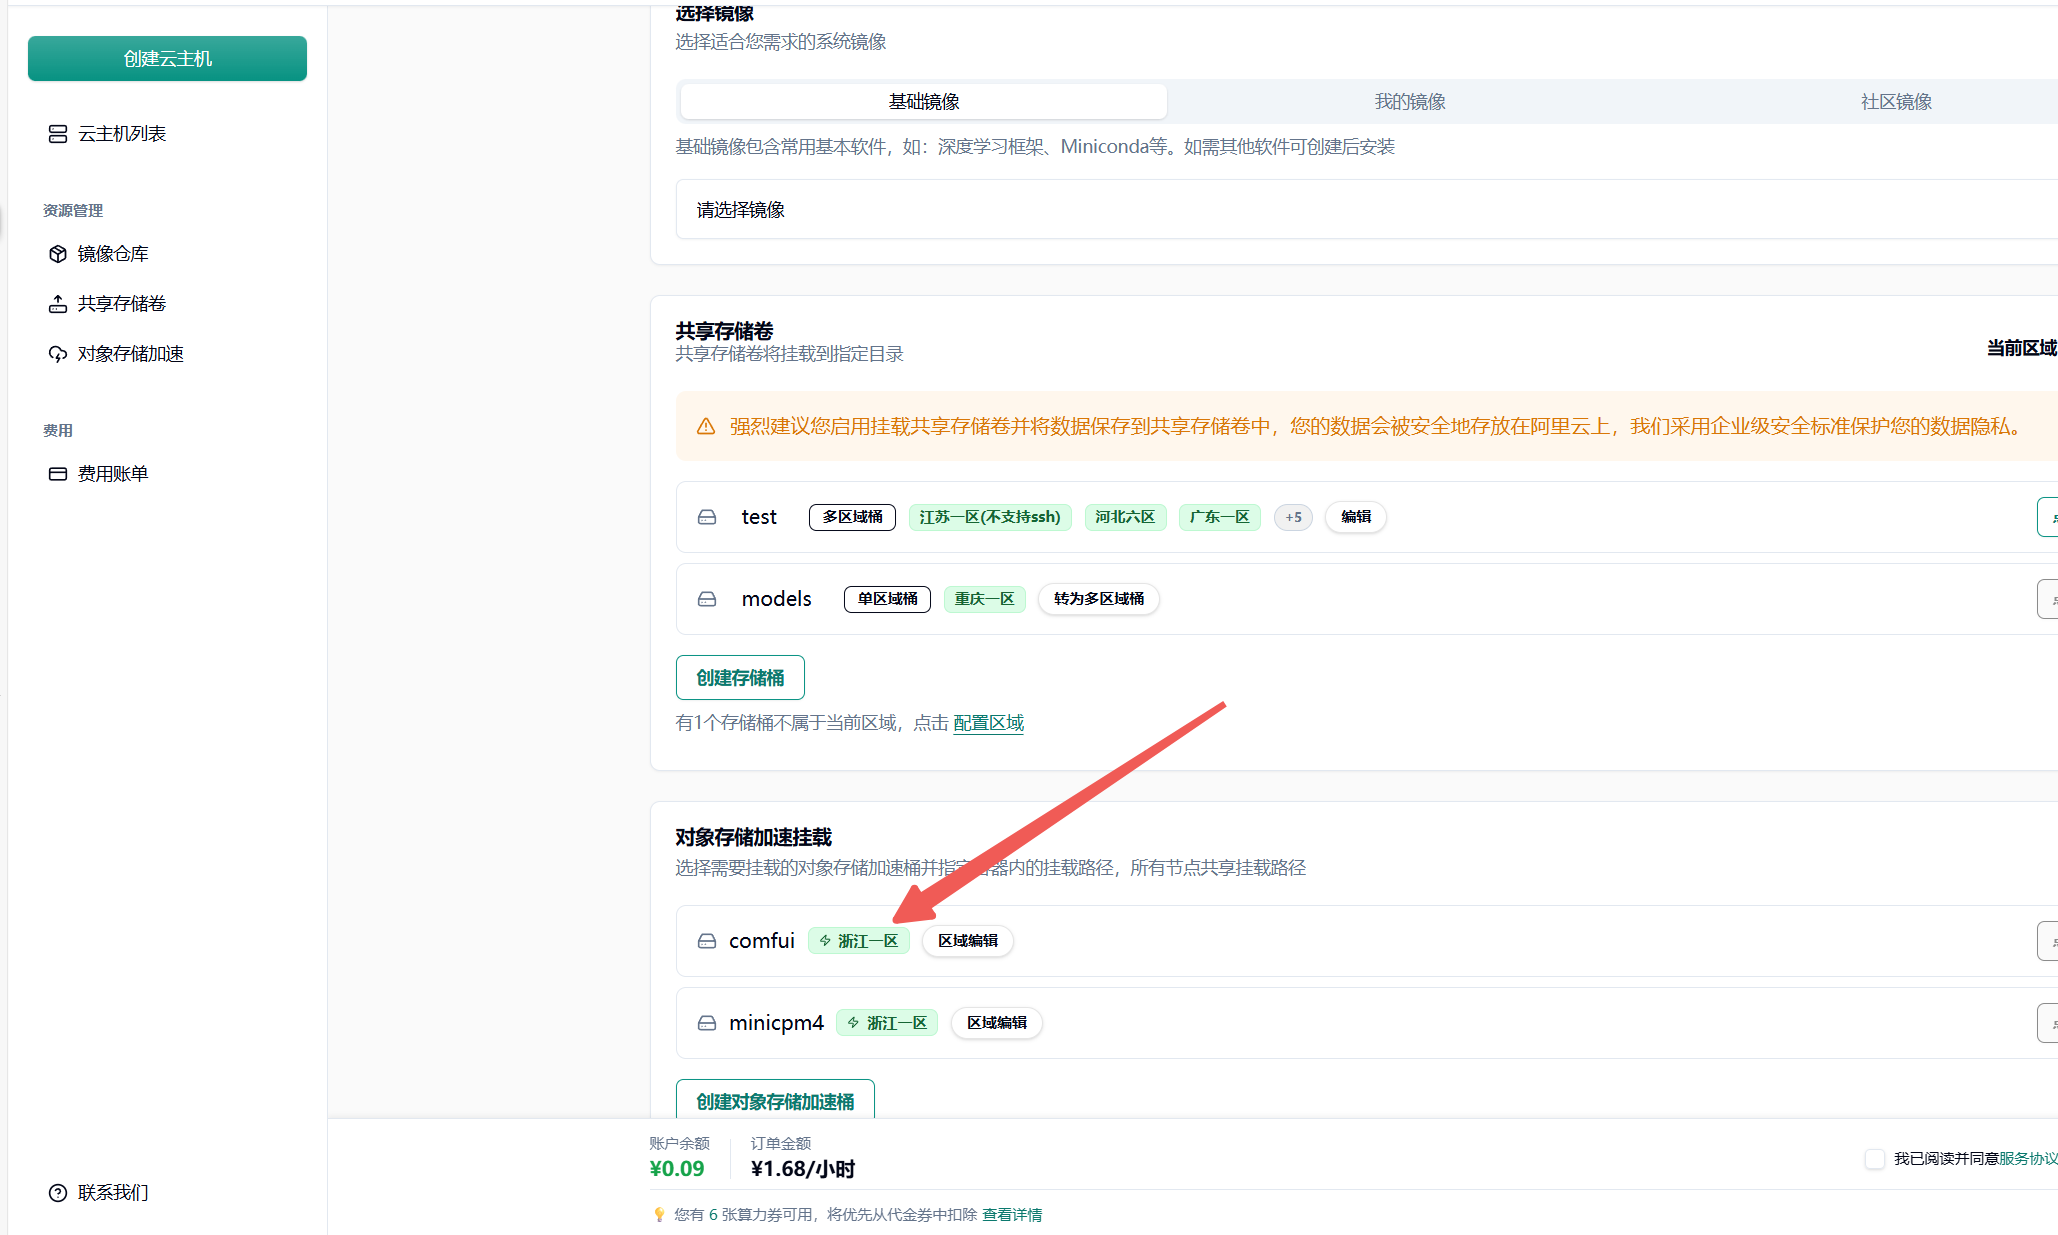
然后在任务发布页面的”存储配置”区域,选择已配置并加速的 S3 存储桶(当前状态为绿色时,可以直接挂载。集群内第一次使用需要等待从云端拉取文件到集群。此操作需从云端将文件下载至本地,因此需等待一定时长。例如,若文件大小为 6.6 G,下载完成大约需要 30 分钟。集群第二次挂载则会直接从本地拉取模型文件)。
为每个对象存储加速目录填写容器内的挂载路径(如 /mnt/my_model_data),路径需以 / 开头。需要注意两个目录的对应关系。
我这里将对象存储 Bucket 中的 /qwen1-5/hub/挂载到了容器中的 /root/.cache/huggingface 目录中
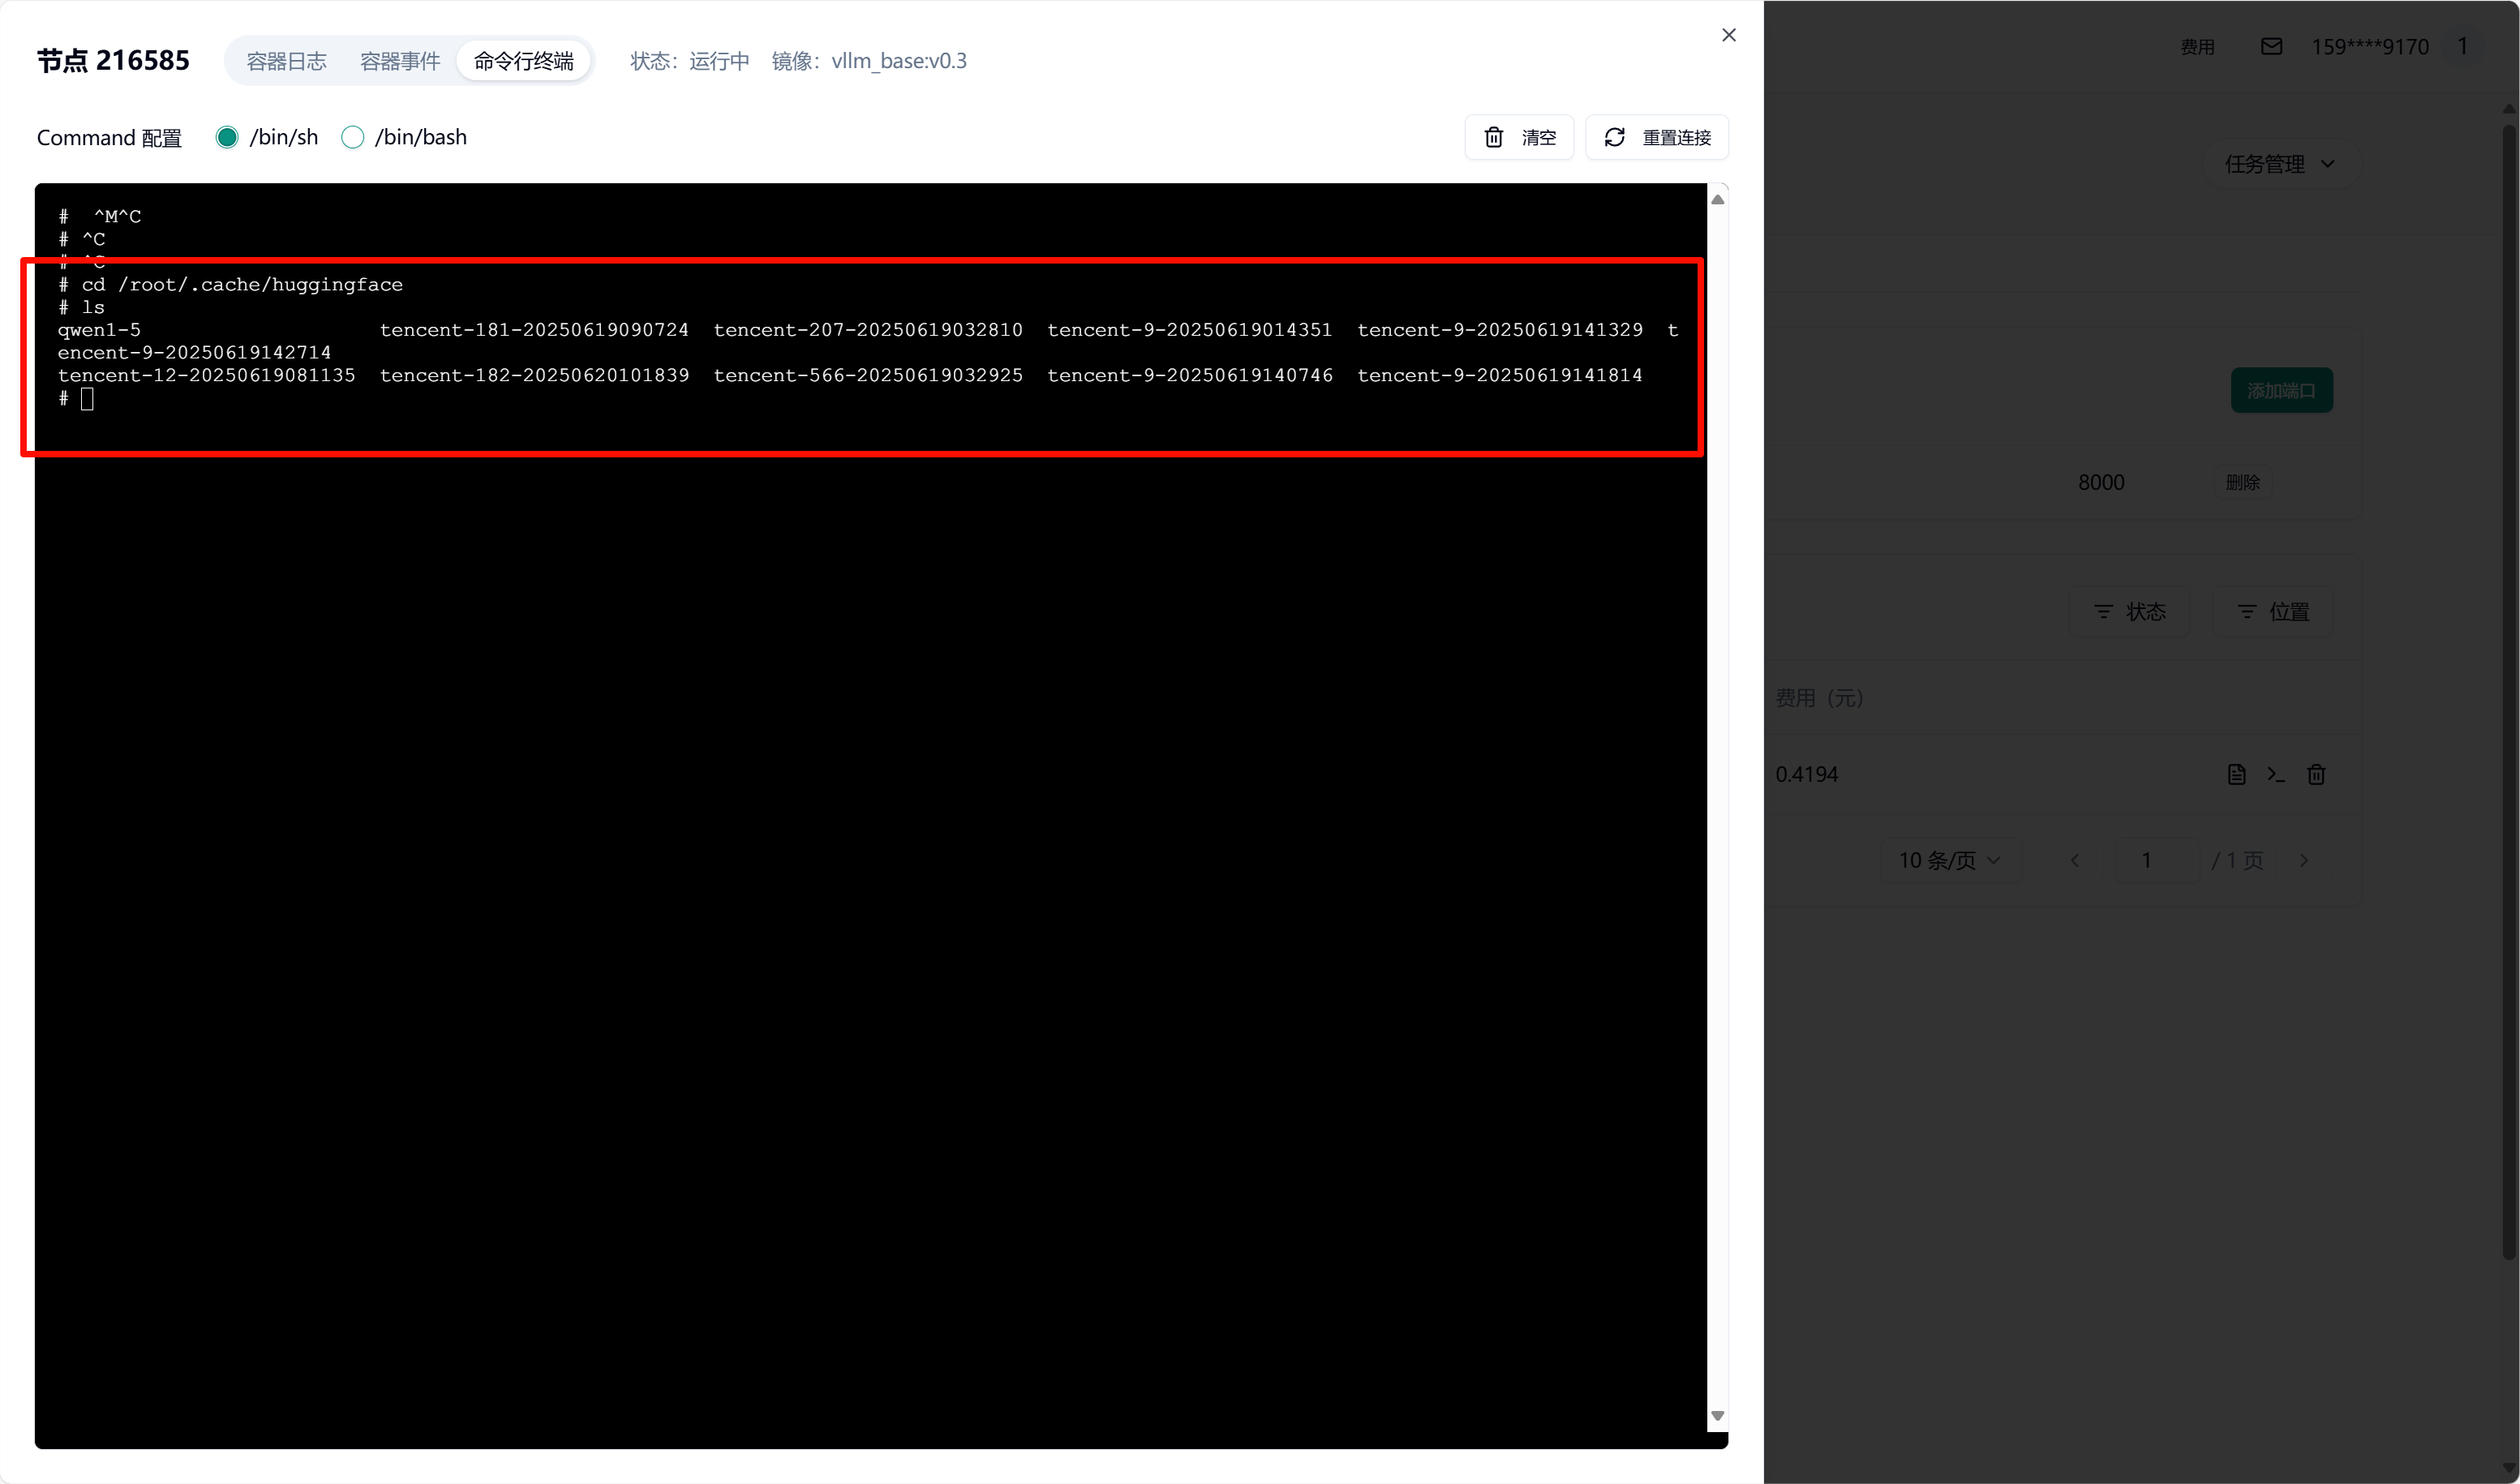
提交任务后,容器启动时会自动挂载所选 S3 存储。待容器启动完成后,可进入容器并验证挂载。查看挂载目录下的文件是否存在
详细配置细节可以参考对象存储加速文档
附录 2 共享存储卷中放置模型
Section titled “附录 2 共享存储卷中放置模型”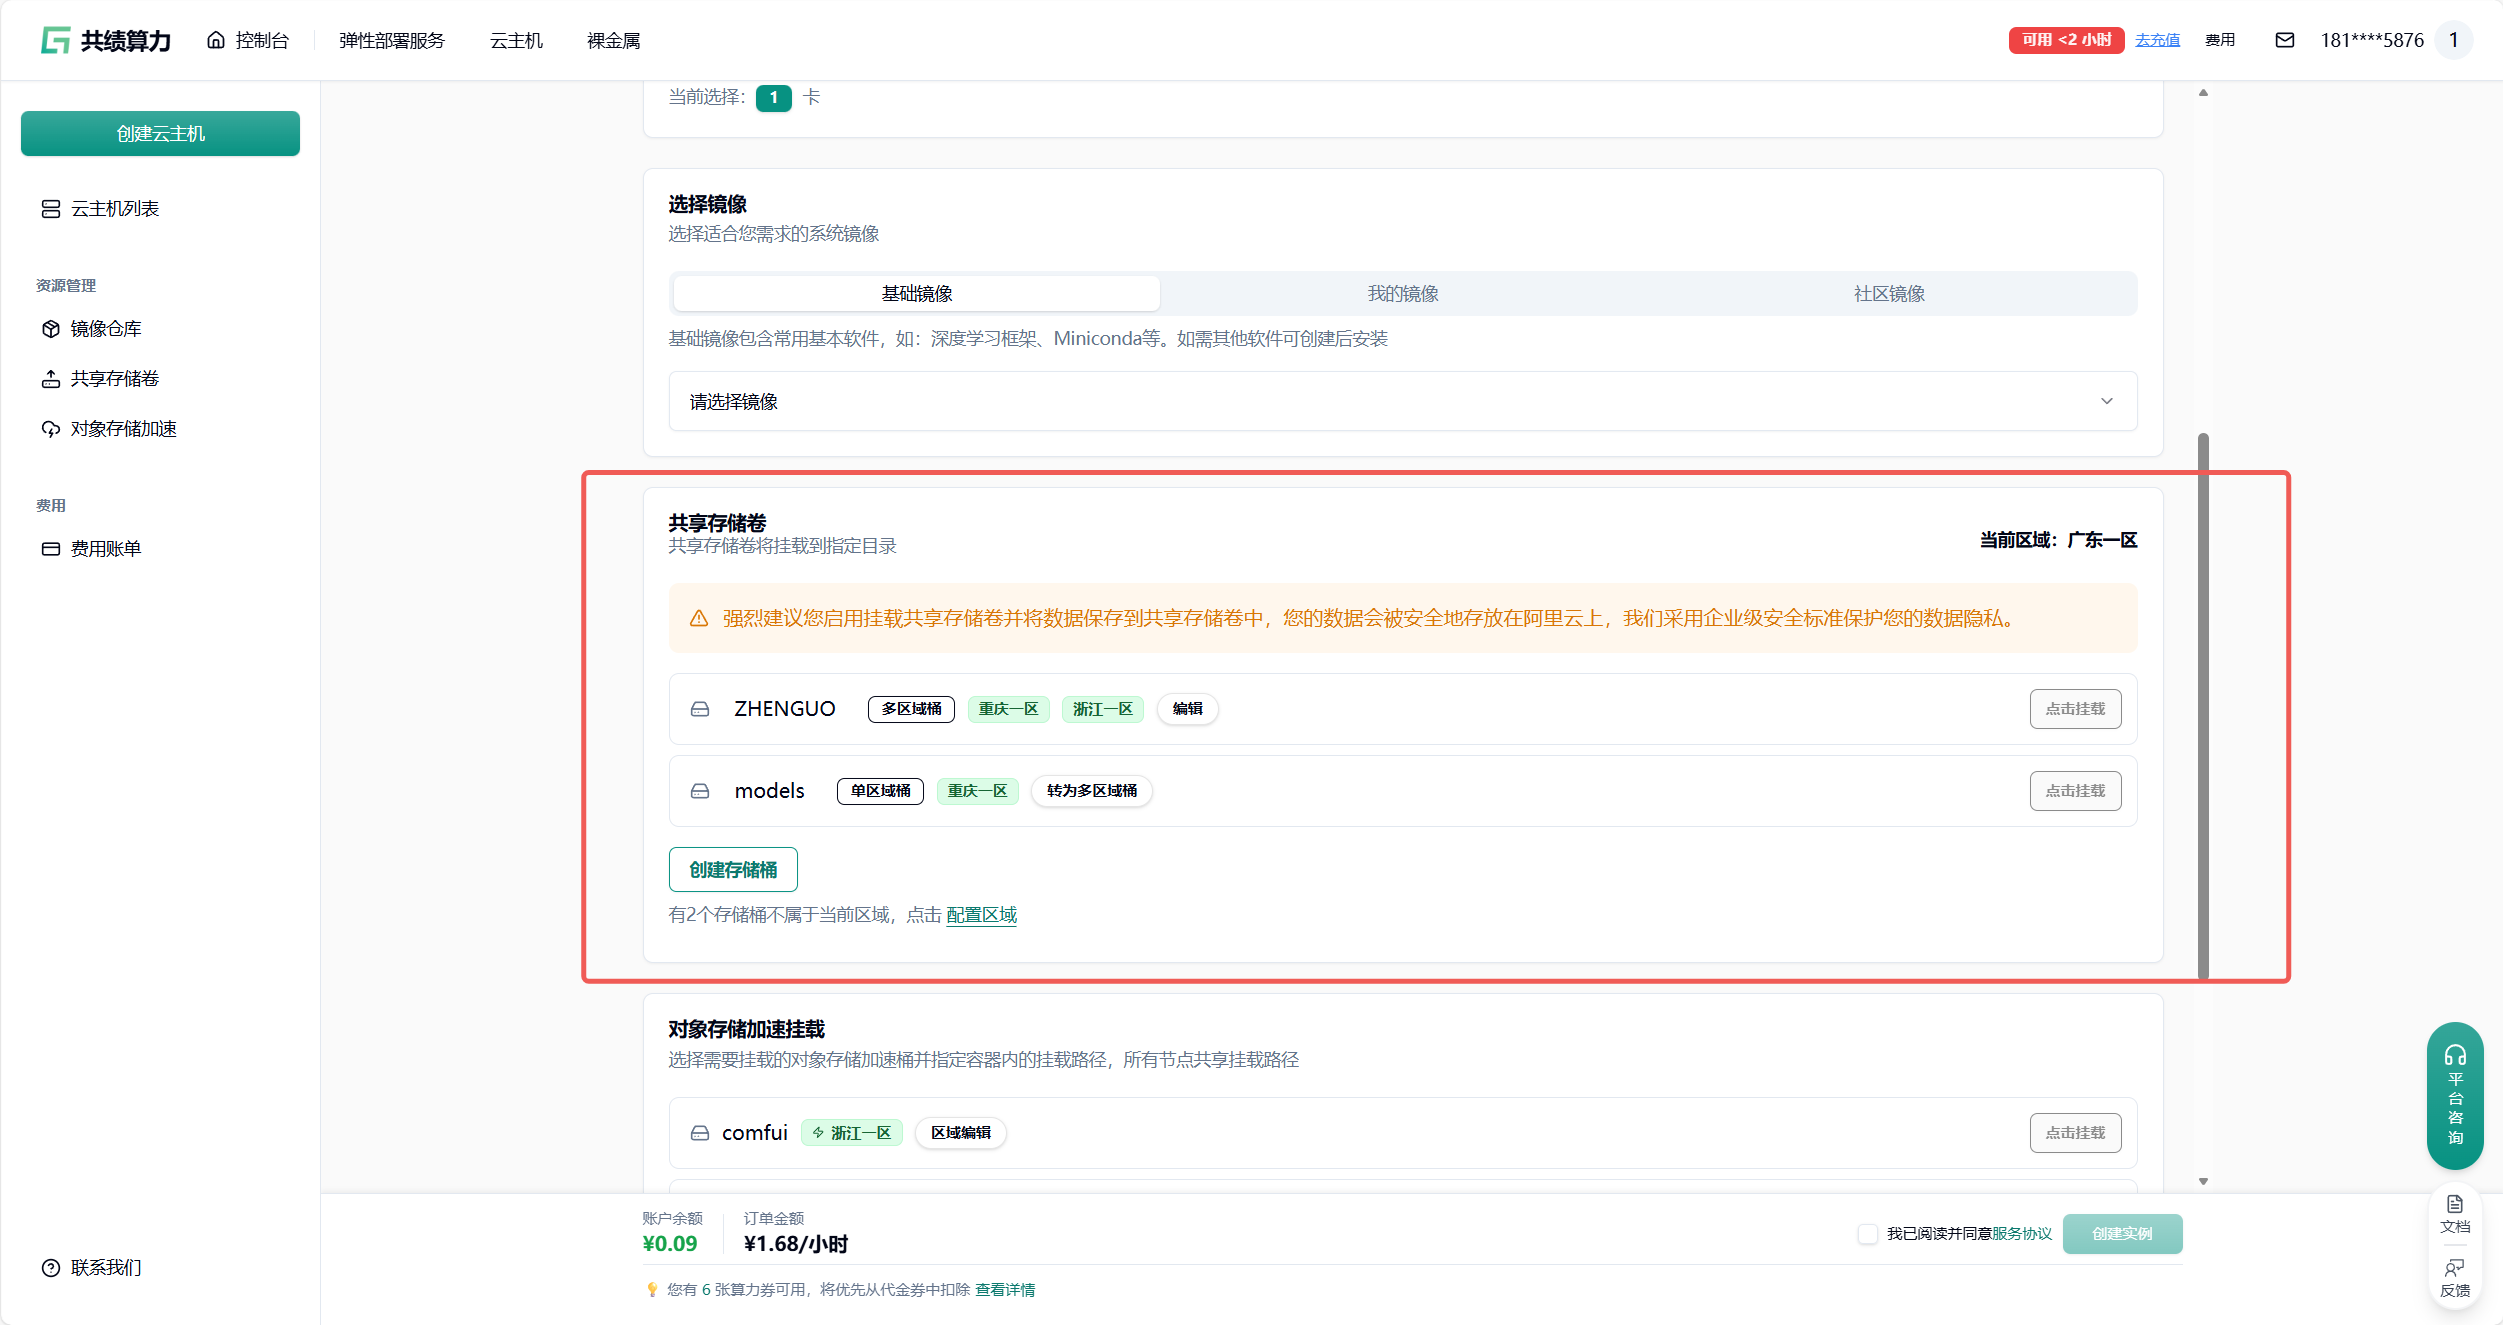
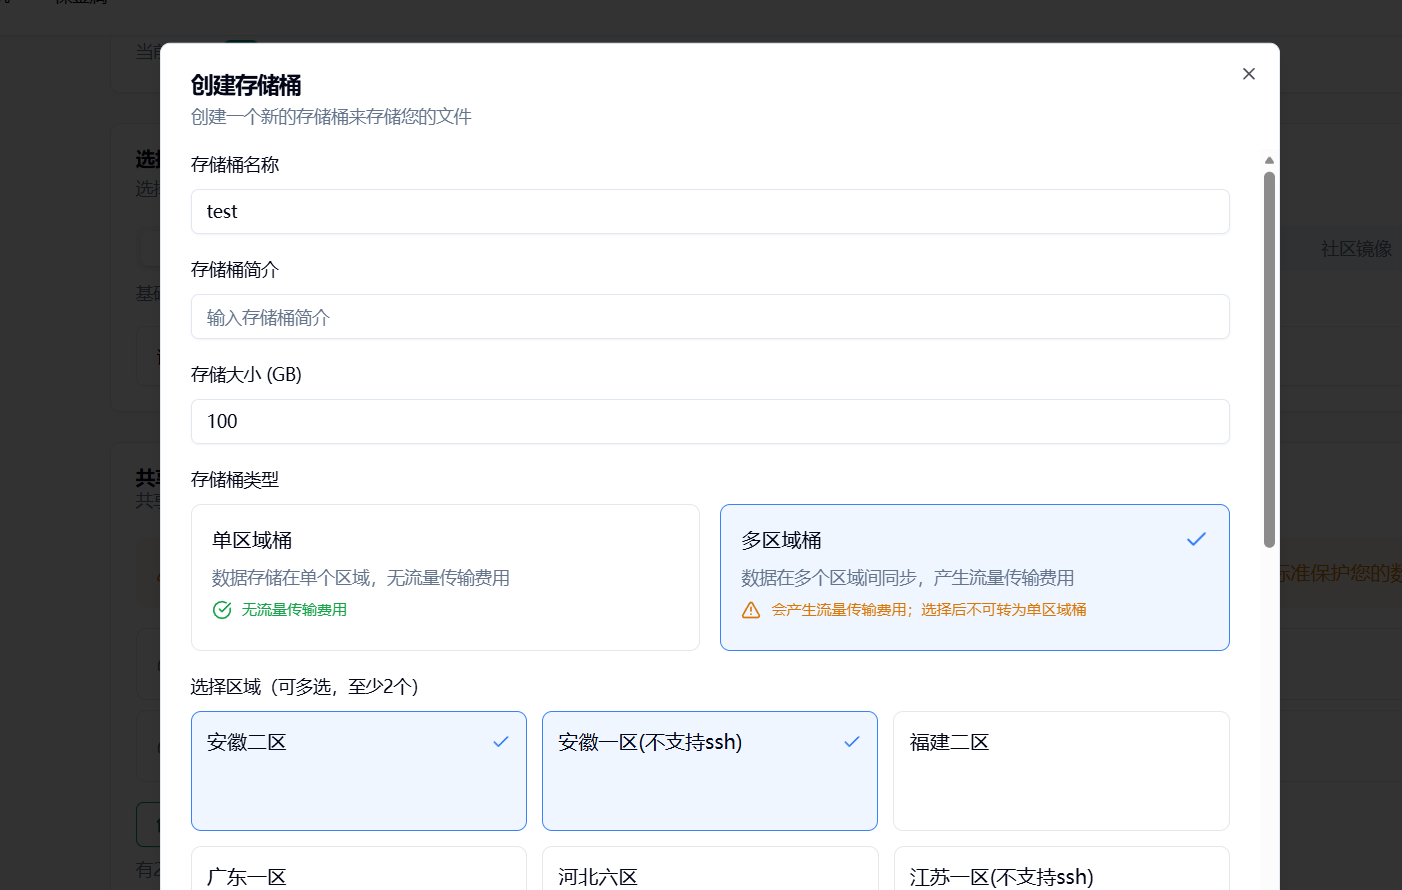
创建新的存储桶:
重要提醒:
• 存储桶共享 200.0 GBGB 总容量,可创建多个存储桶
• 单区域桶无流量传输费用,多区域桶会产生区域间同步费用
• 某地区未使用节点 15 天后,缓存组将被自动释放
• 多实例同时读写可能存在短暂延迟,但保证最终一致性
• 建议定期使用存储桶以避免节点释放影响
配置完成后输入挂载路径
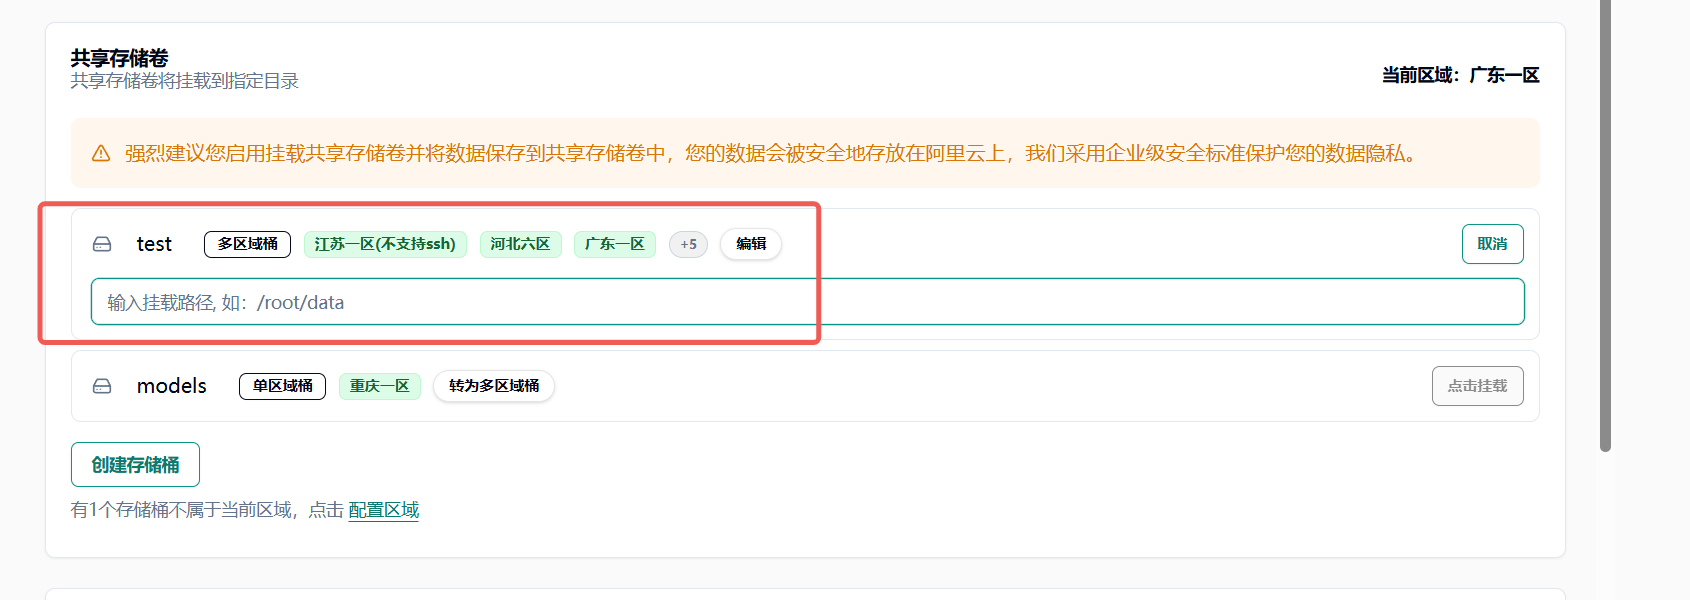
在 jupyterlab 中将模型相关配置下载在挂载路径中(例如 /root/data)以实现多机数据共享 达到镜像和模型的分离